From Digital Design to Physical Object: A Comprehensive Analysis of the 3D Printing Workflow
Executive Summary
Additive manufacturing, commonly known as 3D printing, represents a paradigm shift in the creation of physical objects, transforming digital blueprints into tangible items with unprecedented speed and geometric freedom. This report provides an exhaustive analysis of the end-to-end 3D printing workflow, a multi-stage process that begins with conceptualization in a digital environment and culminates in a finished, functional component. The journey from intangible data to physical reality is navigated through four critical stages: Modeling, Slicing, Printing, and Post-Processing. Each stage presents a series of technological choices and trade-offs that directly influence the quality, cost, and performance of the final product.
The process commences with Modeling, where computer-aided design (CAD) software is used to create a precise three-dimensional digital model. This initial phase is governed by the principles of Design for Additive Manufacturing (DFAM), a holistic approach that requires designers to anticipate the physical constraints of the printing process, such as the need for support structures, minimum wall thickness, and material-specific behaviors. The digital model is then translated into a universally recognized file format—most commonly STL, OBJ, or the modern 3MF standard—each offering different capabilities for storing geometric, color, and manufacturing data.
The second stage, Slicing, acts as the crucial bridge between the digital model and the physical machine. Slicer software dissects the 3D model into hundreds or thousands of thin horizontal layers and generates a file of machine instructions known as G-code. This G-code dictates every movement of the printer, from the path of the print head to the temperature of the extruder and the rate of material deposition. The optimization of slicer settings is a critical lever for controlling the final object's properties, balancing the competing demands of speed, strength, and surface finish.
The Printing stage involves the physical fabrication of the object using one of several core technologies. This report focuses on the three most prevalent polymer-based methods: Fused Deposition Modeling (FDM), which extrudes molten thermoplastic; Stereolithography (SLA), which cures liquid resin with UV light; and Selective Laser Sintering (SLS), which fuses powdered polymer with a laser. The choice of technology is a pivotal decision, dictating material selection, resolution, mechanical properties, and the required post-processing steps. The expanding palette of materials—from basic plastics to engineering-grade composites and biocompatible resins—is the primary enabler of 3D printing's expansion from rapid prototyping to end-use part production.
Finally, raw prints undergo Post-Processing to become finished components. This "hidden factory" of additive manufacturing involves a range of technology-specific techniques, including support removal, chemical washing, UV curing, depowdering, sanding, and surface finishing. These steps are often labor-intensive and are critical for achieving the desired aesthetic quality and mechanical performance.
This comprehensive workflow is supported by a vibrant digital ecosystem of online model repositories, which are evolving from hobbyist sharing communities into professionalized marketplaces. The applications of this technology are transformative, enabling mass personalization and supply chain disruption across industries. In aerospace, it facilitates the creation of lightweight, optimized components. In healthcare, it delivers patient-specific implants and prosthetics. In consumer goods, it ushers in an era of on-demand, customized products. Ultimately, 3D printing's core value lies in its ability to decouple manufacturing cost from geometric complexity, paving the way for a new economic model based on mass personalization and distributed, on-demand production.
Chapter 1: The Additive Manufacturing Paradigm
1.1 Defining the Principles of Additive Manufacturing
Additive manufacturing, the formal term for 3D printing, is a production technique that creates a three-dimensional object from a computer-aided design (CAD) file by depositing material layer by layer.1 This method stands in stark contrast to traditional subtractive manufacturing processes, such as CNC milling or lathing, which begin with a solid block of material and remove portions of it to reveal the final shape.3 The fundamental principle of 3D printing is the sequential addition of material—be it plastic, metal, resin, or composite—to build an object from the ground up, one cross-section at a time.4
The process begins with a digital 3D model, which is then sliced into a series of thin horizontal layers. The 3D printer reads these layers as a set of instructions and deposits the chosen material according to the specified geometry for each layer. When one layer is complete, the build platform moves, and the next layer is deposited on top of it. This cycle repeats until the entire object is fabricated.4
This layer-by-layer approach unlocks the core value proposition of additive manufacturing: the ability to produce parts with immense geometric complexity, often at no additional cost compared to simpler designs. Traditional methods are constrained by tool access; for example, it is difficult to machine intricate internal channels or hollow structures. 3D printing, however, builds the object from the inside out, making such features not only possible but routine.7 This capability allows for the creation of lightweight lattice structures, consolidated assemblies that combine multiple parts into a single component, and organic shapes optimized for performance rather than manufacturability.7
1.2 The End-to-End Workflow: A Four-Stage Process Overview
The journey from a digital concept to a physical object is a structured, multi-stage process. While the specific tools and techniques may vary, the overarching workflow can be consistently divided into four primary stages: Modeling, Slicing, Printing, and Post-Processing.11 Understanding this sequence provides a clear framework for navigating the complexities of additive manufacturing.
Modeling: This is the genesis of the process, where a three-dimensional digital representation of the desired object is created. This is typically accomplished using specialized 3D modeling or CAD software. The designer can either create a model from scratch, modify an existing design, or use a 3D scanner to generate a model from a real-world object.5
Slicing: Once the digital model is complete, it must be translated into a language the 3D printer can understand. This is the role of "slicer" software. The slicer takes the 3D model file, divides it into hundreds or thousands of thin horizontal layers, and generates a file containing machine-specific instructions known as G-code. This file dictates the precise toolpaths, speeds, and temperatures the printer will use to build each layer.11
Printing: This is the stage where the digital becomes physical. The G-code file is sent to the 3D printer, which then begins the automated process of building the object layer by layer. The printer follows the G-code instructions meticulously, depositing, curing, or sintering material to form the final part.11
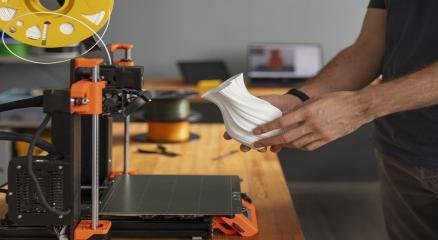
Post-Processing: A raw 3D print is rarely a finished product. The final stage involves a series of finishing steps to prepare the part for its intended use. This can include removing temporary support structures, cleaning away excess material, curing the part to achieve its final strength, sanding to improve surface finish, and painting or coloring for aesthetic purposes.11
It is critical to recognize that these four stages are not isolated but form a chain of dependencies. Decisions made early in the workflow have significant and often irreversible downstream consequences. For instance, the choice of printing technology in the third stage directly determines the necessary post-processing techniques in the fourth.13 A design choice made during the modeling stage, such as including a significant overhang, will necessitate the use of support structures, which must be accounted for in the slicing stage and physically removed during post-processing.6 Similarly, the selection of a specific material is constrained by the capabilities of the chosen printer technology and will influence the final mechanical properties of the object.4 This interconnectedness gives rise to the concept of "Design for Additive Manufacturing" (DFAM), an expert approach that involves thinking holistically about the entire process from the very beginning. An effective designer must not only create a digital model but must do so with a clear understanding of how it will be sliced, printed, and finished to achieve the desired outcome.
Chapter 2: Digital Genesis: Modeling and Design for 3D Printing
2.1 The Role of Computer-Aided Design (CAD) Software
The entire 3D printing workflow originates with a digital file, making computer-aided design (CAD) software the essential starting point for creation. CAD software provides the tools to translate an abstract idea into a precise, three-dimensional digital model that can be manipulated, analyzed, and ultimately sent to a printer for fabrication.18 It is the virtual workbench where objects are conceived and defined with dimensional accuracy, surface textures, and material properties before any physical material is consumed.11
The landscape of 3D design software is diverse, encompassing a range of tools tailored for different industries and applications. These can be broadly categorized:
3D CAD Software: Primarily used by engineers, architects, and product designers, these programs focus on creating precise, technical models with accurate dimensions and tolerances. They are the standard for designing mechanical parts, industrial equipment, and architectural structures.20
3D Modeling Software: Often used in media, entertainment, and graphic design, these tools excel at creating organic shapes, characters, and environments. They provide greater artistic freedom but may prioritize aesthetics over strict dimensional accuracy.20
Specialized Software: The field also includes highly specialized tools such as Building Information Modeling (BIM) software for construction, visual effects (VFX) software for film and games, and generative design platforms that use algorithms to create optimized forms.20
For the purpose of 3D printing, the software must not only facilitate the creation of a model but also ensure that the design is printable and optimized for the chosen manufacturing process. This involves features that can identify and repair errors in the model, simulate its performance under stress, and export it in a compatible file format.19
2.2 Comparative Analysis: Professional CAD Platforms
While countless modeling tools are available, a few professional-grade platforms have become industry standards for their robust feature sets tailored to additive manufacturing.
Autodesk Fusion is a comprehensive, cloud-based platform that integrates CAD, computer-aided manufacturing (CAM), and computer-aided engineering (CAE) into a single environment. This integration makes it particularly well-suited for modern, collaborative product development workflows.19 For 3D printing, Fusion offers a powerful suite of tools, including:
Parametric Modeling: Allows designs to be built around adjustable parameters, enabling easy and consistent updates to the model's geometry.19
Simulation: Provides built-in tools to test how a model will perform under real-world conditions, helping to identify structural weaknesses before printing.19
Mesh Editing: Enables the direct import, modification, and repair of mesh files (like STLs), which is crucial for preparing complex geometries for printing.19
Direct Export: Supports seamless export to industry-standard formats such as STL, OBJ, and 3MF, ensuring compatibility with slicers and printers.19
SOLIDWORKS is another dominant force in the professional CAD space, widely used for mechanical design and engineering. Its offerings, particularly under the "SOLIDWORKS for Makers" and "3DEXPERIENCE" platforms, include features specifically designed to optimize models for 3D printing.18 Key capabilities include:
Geometry Analysis: Tools that automatically identify potential problem areas for 3D printing, such as walls that are too thin or discontinuous faces.18
Topology Optimization: An advanced feature that algorithmically generates the most efficient shape for a part based on its functional constraints, removing material where it is not needed to create lightweight yet strong designs.18
Undercut Analysis: Helps designers identify areas that will require support structures, allowing them to modify the design to improve printability.18
While platforms like Fusion and SOLIDWORKS offer integrated solutions, other powerful tools like Autodesk Inventor are also used, especially for designing highly complex mechanical assemblies and machinery.12 The choice of platform often depends on the specific industry, the complexity of the project, and the need for collaborative features.
2.3 Fundamental Design Principles for Printability
A model that looks perfect on a computer screen may fail catastrophically during the printing process. This is because the digital environment is an idealized space without physical forces like gravity, internal stress, or thermal dynamics, all of which are present during fabrication.6 Adhering to a set of fundamental design principles is therefore essential to ensure a successful transition from digital to physical.
Wall Thickness: This is the most commonly overlooked yet critical aspect of design for 3D printing. In a digital environment, it is possible to create a surface with zero thickness, but in the physical world, every wall must have a substantial thickness to be structurally sound. Thin walls are prone to breaking, warping during the cooling process, or simply not printing at all. A general rule of thumb is to avoid designing any element with a thickness of less than 1 mm.6
Watertight Geometry: A 3D model intended for printing must be a "manifold" or "watertight" object. This means it must consist of a single, continuous outer surface with no holes or gaps. Any disconnected pieces within the geometry will be printed as separate, detached objects, and any holes in the mesh can confuse the slicer, leading to print failures.6
Support Structures and Overhangs: For layer-based technologies like FDM and SLA, each new layer must be deposited onto a layer below it. This creates a problem for features that overhang into empty space. Generally, any overhang with an angle greater than 45 degrees from the vertical will require a temporary support structure to be printed beneath it. These supports are later removed in post-processing. While necessary, they consume extra material and time and can leave marks on the surface. Good design practice involves orienting the model or modifying its geometry to minimize the need for supports.6 Powder-based technologies like SLS do not require dedicated support structures, as the surrounding unsintered powder provides natural support.6
Hollowing and Escape Holes: Printing large, solid objects can be time-consuming and expensive due to the amount of material required. For technologies like SLA and SLS, it is common practice to hollow out the interior of large models. This not only saves material and cost but also reduces production time and can prevent issues like warping caused by thermal stress.6 When a model is hollowed, it is crucial to include one or more "escape holes." These small openings allow uncured liquid resin (in SLA) or unsintered powder (in SLS) to be removed from the internal cavity during post-processing.6
Resolution and Tolerance: Every 3D printer has a maximum resolution, which defines the smallest feature size it can accurately reproduce. In general, details smaller than 0.1 mm will likely not be visible in the final print.6 Designers must also account for the printer's dimensional tolerance—the small deviation between the dimensions of the digital model and the final physical object. This tolerance must be considered when designing parts that need to fit together precisely.6
2.4 Advanced Modeling Techniques
Beyond the fundamental principles, advanced modeling techniques allow designers to fully leverage the unique capabilities of additive manufacturing to create highly optimized and innovative parts.
Parametric Modeling: This design approach is based on defining relationships and constraints between different geometric elements using parameters (e.g., variables for length, angle, or thickness). When a parameter is changed, the entire model automatically updates to maintain the defined relationships. This makes it incredibly efficient to iterate on designs and create families of related parts.19
Generative Design: This represents a paradigm shift in the design process. Instead of a human designer drawing a specific shape, they define the problem: key parameters such as loads, constraints, material properties, and manufacturing method. The software then uses AI-driven algorithms to explore thousands of potential design permutations, generating solutions that are optimized for performance metrics like strength-to-weight ratio.19
Simulation and Topology Optimization: Simulation tools allow designers to apply virtual forces, pressures, and thermal loads to a digital model to predict how it will behave in the real world. This helps identify and correct design flaws before committing to a physical print.19 Topology optimization is a form of simulation that automatically refines a part's geometry, adding material where stress is high and removing it from non-critical areas. This process results in organic, bone-like structures that are lightweight but exceptionally strong.18
Lattice Structures and Volumetric Modeling: 3D printing makes it possible to design parts with complex internal geometries. One powerful application of this is the creation of internal lattice structures. These repeating, interconnected struts can significantly reduce a part's weight and material consumption while maintaining a high degree of structural integrity. Volumetric modeling tools enable the design of these intricate, high-detail internal and external shapes.19
The rise of these advanced modeling paradigms marks a fundamental transition in engineering design, moving from forms dictated by human intuition and traditional manufacturing constraints to forms optimized by machine intelligence for performance. The organic, often non-intuitive shapes produced by generative design and topology optimization are frequently impossible to create using subtractive methods but are perfectly suited for the layer-by-layer fabrication of 3D printing. This creates a powerful symbiotic relationship: the demand for high-performance, lightweight components, particularly in industries like aerospace 7, drives the adoption of these advanced software tools. In turn, these tools produce complex geometries that can only be realized through additive manufacturing, reinforcing the value and necessity of the technology. This evolution represents a change in the role of the engineer—from being the sole creator of a design to becoming a curator of machine-generated solutions, defining problems and selecting the optimal outcome from a range of possibilities.
Chapter 3: The Digital Blueprint: A Comparative Analysis of 3D File Formats
Once a 3D model is finalized, it must be exported into a standardized file format that can be read by slicer software. This file acts as the digital blueprint, containing the geometric data that describes the object's shape. The choice of file format is a critical decision, as it determines what kind of information—from basic geometry to complex color and material data—is passed on to the next stage of the workflow. The historical development of these formats directly reflects the growing capabilities of 3D printing technology itself.
3.1 STL (STereoLithography): The Universal Standard
The STL file format, whose name originates from Stereolithography, has been the de facto standard for 3D printing since its release in 1987.21 Its longevity is a testament to its simplicity and universal compatibility; virtually every piece of 3D printing hardware and software in the world can read and process an STL file.22 An STL file describes the surface geometry of a 3D object using a collection of interconnected triangles, a method known as tessellation.21
However, the primary strength of the STL format—its simplicity—is also its greatest weakness. An STL file contains nothing more than the raw, unstructured geometric data of the triangulated surface. It is incapable of storing any additional information, such as:
Color
Texture
Material properties
Scale or units 21
This was not a significant limitation in the early days of 3D printing, when machines could only print with a single material in a single color. However, with the advent of modern multi-material and multi-color printers, the inability of the STL format to carry this richer data has become a major bottleneck.22 Furthermore, the format is prone to errors such as holes, gaps, and overlapping triangles, which can result from a poor conversion process and often require manual repair before a model can be successfully sliced.22
3.2 OBJ: Incorporating Color and Texture Data
The OBJ file format emerged from the 3D graphics and animation industry, where the need to represent color and texture has long been paramount.23 Unlike STL, the OBJ format was designed to store more than just basic geometry. It can contain data describing the object's shape as well as its surface color and texture map information.22
This additional data is often stored in a companion file with a .mtl (Material Template Library) extension, which is referenced by the main .obj file.22 This capability makes OBJ a superior choice for applications where visual appearance is critical, such as printing full-color figurines, detailed architectural models, or objects derived from 3D scans that have captured surface texture.24 While more capable than STL, OBJ is not as universally supported by all slicers and printers, and compatibility must be verified, especially when dealing with complex texture data.24 For many applications, converting an OBJ to an STL is still a common step to ensure broad compatibility, though this process strips away the valuable color and texture information.24
3.3 3MF (3D Manufacturing Format): The Modern Standard
The limitations of both STL and OBJ in the face of increasingly sophisticated printing hardware led to the development of the 3D Manufacturing Format (3MF). Spearheaded by the 3MF Consortium—a group of industry leaders including Microsoft, Autodesk, HP, and Stratasys—3MF was designed from the ground up to be a modern, comprehensive, and unambiguous file format for additive manufacturing.21
Based on XML, 3MF is not a single file but rather a compressed package (similar to a .zip archive) that acts as a container for a complete set of manufacturing data.21 A single .3mf file can contain:
Advanced Geometry: It describes geometry accurately, using methods like curved triangular tessellations, and has a clear definition of manifoldness, which helps prevent the errors common in STL files.21
Full Color, Material, and Texture Information: It can store detailed data for multi-property parts, making it ideal for the most advanced multi-material and full-color printers.22
Print and Slicer Settings: It can embed printer profiles and specific slicer settings, such as infill patterns, support structures, and layer heights, directly within the file. This ensures that a model will be printed exactly as the designer intended, regardless of the machine used.21
Metadata: It can include other useful information like the designer's name, a description of the part, and even a thumbnail image for easy identification.21
A key advantage of 3MF is its efficiency. For example, if a print job contains multiple copies of the same object, an STL file would have to duplicate the entire mesh geometry for each copy. A 3MF file, by contrast, can store the mesh once and simply reference it multiple times at different locations, significantly reducing file size.21 As a result of these features, 3MF files are considered "ready-to-print," bundling all the necessary information into a single, portable, and error-free package.22
The evolution of these file formats clearly mirrors the progression of 3D printing technology. STL was sufficient for the initial era of simple, single-material machines. The rise of multi-color printing capabilities brought OBJ into the ecosystem. Finally, the emergence of complex, multi-material manufacturing systems with intricate process controls created a data bottleneck that older formats could not handle, necessitating the creation of a comprehensive standard like 3MF. The file format is therefore not merely a technical specification; it is a direct enabler of technological innovation. The rich, all-in-one data structure of 3MF is paving the way for more intelligent, automated, and repeatable manufacturing workflows, where the designer's full intent—from geometry to material to print settings—is seamlessly and unambiguously transferred to the machine.
Table 3.1: Comparative Analysis of 3D Printing File Formats
To provide a clear, at-a-glance summary of these key formats, the following table compares their characteristics and primary applications.
Feature
STL (STereoLithography)
OBJ (Object File)
3MF (3D Manufacturing Format)
Extension
.stl
.obj (with optional .mtl)
.3mf
Data Supported
Geometry only
Geometry, Color, Texture
Geometry, Color, Texture, Materials, Slicer Settings, Metadata
File Structure
Raw, unstructured triangular mesh
Vertex-based geometry with references to a separate material file
XML-based compressed archive (like a.zip file) containing all data
Key Advantage
Universal compatibility; supported by virtually all hardware and software
Supports color and texture data, making it suitable for visual models
All-in-one data package; error-free, efficient, and unambiguous
Key Limitation
No support for color, material, or other metadata; prone to geometric errors
Texture/color data is in a separate file; not as universally supported as STL
Newer format, so adoption is not yet as widespread as STL
Primary Use Case
Prototyping, simple mechanical parts, and ensuring maximum compatibility
Full-color figurines, architectural models, 3D scanned objects
Professional multi-material/multi-color prints, sharing complete print jobs
Chapter 4: From Model to Machine: The Critical Role of Slicing and G-Code
4.1 The Function of Slicer Software
After a 3D model has been designed and exported to a suitable file format, it must be prepared for the physical printing process. This crucial translation is performed by a specialized piece of software known as a "slicer".12 The slicer's primary function is to convert the continuous geometry of a 3D model into a series of discrete instructions that a 3D printer can execute. It achieves this by digitally "slicing" the model into hundreds or thousands of thin, horizontal layers, and for each layer, it generates the precise toolpaths the printer's head will follow.6
Beyond simply dividing the model into layers, the slicer is responsible for calculating and generating several critical elements required for a successful print:
Infill: Solid objects are rarely printed completely solid. To save material and time, the slicer generates an internal support structure known as infill, which can take the form of various patterns like grids, honeycombs, or triangles.25
Support Structures: For any parts of the model that overhang, the slicer automatically generates temporary support structures to prevent the material from drooping or collapsing during the print.25
Adhesion Aids: The slicer can add features like brims or rafts around the base of the model to improve its adhesion to the build plate and prevent warping.25
The output of the slicer is a G-code file, which contains the comprehensive set of commands for the printer.12 The market for slicer software is robust, with several popular options available, many of which are open-source. Prominent examples include Ultimaker Cura, PrusaSlicer (a fork of Slic3r), and ideaMaker, each offering a user-friendly interface alongside advanced configuration options.12
4.2 Decoding G-Code: The Language of 3D Printers
G-code is the standard programming language used to provide instructions to computer numerical control (CNC) machines, a category that includes 3D printers.25 It is a plain-text language, and the .gcode file generated by the slicer is essentially a long list of sequential commands that tell the printer exactly what to do at every moment of the print job.11 While most users never need to write G-code manually, a basic understanding of its structure is invaluable for troubleshooting prints and comprehending the inner workings of the machine.27
G-code commands are typically organized into two main categories:
G-commands (General Commands): These primarily control the motion of the printer's axes (X, Y, and Z) and the extruder (E). The most common command in any G-code file is G1, which instructs the printer to perform a linear movement to a specified coordinate while extruding a certain amount of material.25 Other essential G-commands include G28 (home all axes to their origin points) and G90/G91 (set positioning to absolute or relative coordinates).25
M-commands (Miscellaneous Commands): These control all other functions of the machine that are not related to movement. This includes managing temperatures, fan speeds, and other system-level operations.25 Key M-commands include M104 (set the extruder temperature and continue) and M109 (set the extruder temperature and wait for it to be reached), M140/M190 for the heated bed, and M106/M107 to turn the part cooling fan on and off.25
A typical G-code file begins with a startup sequence that prepares the machine for printing. An annotated example of such a sequence might look like this 28:
G-Code
G90 ; Set to absolute positioning mode
M82 ; Set extruder to absolute mode
M104 S200 ; Set extruder temperature to 200°C (don't wait)
M140 S60 ; Set bed temperature to 60°C (don't wait)
G28 ; Home all axes (X, Y, Z)
G29 ; Perform auto bed leveling routine
M109 S200 ; Wait for extruder to reach 200°C
M190 S60 ; Wait for bed to reach 60°C
G1 Z0.2 F1200 ; Move to the starting height for the first layer
Following this preamble, the file will contain thousands of G1 commands, each defining a small segment of the toolpath for every layer of the object.
4.3 Optimizing Slicer Settings for Quality, Speed, and Strength
While the slicer automates the complex task of generating G-code, it provides the user with a vast array of settings to control and optimize the final output. The slicer acts as the critical nexus where the idealized digital model meets the physical realities of the printing process. It is at this stage that abstract goals—such as the need for a quick prototype versus a strong functional part—are translated into quantifiable machine instructions.
A single digital model can be transformed into a wide spectrum of physical objects with vastly different properties simply by altering the slicer settings. Key parameters and their associated trade-offs include:
Layer Height: This determines the vertical resolution of the print. A lower layer height (e.g., 0.1 mm) produces a smoother, more detailed surface finish but significantly increases the print time. A higher layer height (e.g., 0.3 mm) prints much faster but results in more visible layer lines.16
Infill Density and Pattern: Infill is the internal structure of the print. A higher infill density (e.g., 80%) creates a stronger, heavier, and more durable part but consumes more material and time. A lower density (e.g., 15%) is suitable for visual models where strength is not a priority. The pattern of the infill (e.g., grid, gyroid, honeycomb) can also affect the part's mechanical properties in different directions.
Print Speed: This setting controls how fast the print head moves. Higher speeds reduce print time but can lead to lower quality, such as ringing or poor layer adhesion. Finding the optimal speed is a balance between efficiency and quality.
Temperature: The temperatures of the extruder nozzle and the heated bed are critical for proper material extrusion and adhesion. These settings are material-specific and must be dialed in correctly to prevent issues like under-extrusion or warping.
Support Settings: The user can control where and how support structures are generated, including their density and the type of interface with the model, which affects how easily they can be removed.
Mastery of 3D printing, therefore, is not just about creating a good digital model; it is about developing a deep understanding of how these slicer settings interact to influence the final physical object. The slicer is the most powerful tool for optimization in the entire workflow, allowing an operator to precisely balance the competing demands of quality, speed, and strength to meet the specific requirements of any given project.
Chapter 5: A Taxonomy of 3D Printing Technologies
The term "3D printing" encompasses a variety of distinct processes, each with its own method for building objects layer by layer. While numerous technologies exist, the polymer-based additive manufacturing landscape is dominated by three primary methods: Fused Deposition Modeling (FDM), Stereolithography (SLA), and Selective Laser Sintering (SLS). The choice of technology is one of the most consequential decisions in the workflow, as it dictates everything from material compatibility and part resolution to mechanical performance and post-processing requirements.16
5.1 Fused Deposition Modeling (FDM) / Fused Filament Fabrication (FFF)
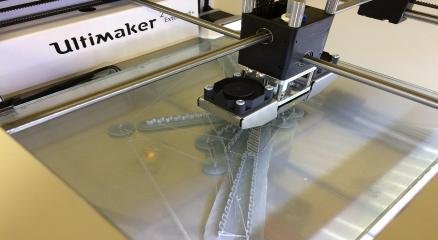
Fused Deposition Modeling, also known by the open-source term Fused Filament Fabrication, is the most widely recognized and accessible form of 3D printing.11 The process is conceptually simple, often compared to operating a sophisticated, computer-controlled hot glue gun.4
Process: A solid thermoplastic filament is unwound from a spool and fed into a heated extruder, or "print head." The extruder melts the filament and deposits the molten plastic through a small nozzle onto a build platform. The print head moves along the X and Y axes to draw the shape of a single layer. Once the layer is complete, the build platform lowers slightly along the Z axis, and the process repeats, building the object from the bottom up.4 For features with overhangs, the printer deposits temporary support structures that are removed after the print is complete.29
Characteristics: FDM is celebrated for its affordability, ease of use, and broad range of available materials, making it a popular choice for hobbyists, educators, and businesses creating functional prototypes and rapid tooling.4 However, its primary drawbacks are related to resolution and mechanical properties. The nature of the extrusion process results in visible layer lines, especially on curved surfaces, leading to a rougher surface finish compared to other technologies.16 Furthermore, FDM parts exhibit anisotropy, meaning they are mechanically weaker in the vertical (Z) direction because the layers are fused together rather than being chemically bonded. This can cause parts to delaminate or break along the layer lines when under stress.4
5.2 Stereolithography (SLA)
Stereolithography holds the distinction of being the first commercialized 3D printing technology and remains the gold standard for achieving high detail and smooth surface finishes.5
Process: SLA operates on the principle of photopolymerization. A build platform is submerged in a vat of liquid photopolymer resin. A highly precise ultraviolet (UV) laser or a digital light projector (in a variation called DLP) selectively traces the cross-section of a layer onto the surface of the resin, causing it to cure and solidify. After a layer is formed, the platform moves up (or down, in inverted systems) by a small increment, and a fresh layer of resin is exposed for the next curing cycle. This process continues until the part is complete.2 Similar to FDM, SLA requires support structures for overhanging features.29
Characteristics: The key strength of SLA is its exceptional precision. It can produce parts with incredibly fine details (features as small as 0.1 mm) and a surface finish that is nearly indistinguishable from that of an injection-molded part.4 This makes it the ideal technology for applications where aesthetic quality and intricate detail are paramount, such as jewelry casting masters, dental models, and visual prototypes.4 The trade-offs include higher equipment and material costs compared to FDM, and a more involved and messy post-processing workflow that requires washing the part in a solvent and then curing it in a UV chamber to achieve its final mechanical properties.16 Additionally, standard resin parts can be brittle and may degrade with prolonged exposure to UV light.4
5.3 Selective Laser Sintering (SLS)
Selective Laser Sintering is an industrial-grade technology renowned for its ability to produce strong, functional parts with a high degree of design freedom.16
Process: The SLS process begins with a thin layer of polymer powder (most commonly nylon) being spread across a build platform. A high-powered CO2 laser then scans the cross-section of the layer, selectively heating and fusing (sintering) the powder particles together to form a solid. After the layer is complete, the platform lowers, a fresh layer of powder is applied, and the process repeats.6
Characteristics: The most significant advantage of SLS is that it is a self-supporting process. The unsintered powder that surrounds the part during the build acts as a natural support structure, eliminating the need for dedicated, manually removed supports.6 This grants designers almost unlimited geometric freedom, allowing for the creation of complex, interlocking, and movable parts that would be impossible to produce with FDM or SLA. SLS parts possess excellent, nearly isotropic mechanical properties, making them strong and durable enough for end-use applications and functional testing.16 The main disadvantages are the high initial cost of the equipment, the need for a controlled facility environment, and a mandatory cooling period after printing that can last up to 12 hours.16 The resulting parts have a slightly rough, grainy surface finish with a matte appearance.16
Table 5.1: FDM vs. SLA vs. SLS Technology Matrix
The following matrix provides a detailed comparison of these three core technologies across a range of critical metrics, designed to aid in selecting the most appropriate process for a given application.
Metric
Fused Deposition Modeling (FDM)
Stereolithography (SLA)
Selective Laser Sintering (SLS)
Process
Extrusion of molten thermoplastic filament
Curing of liquid photopolymer resin with UV light
Fusing of polymer powder with a high-powered laser
Materials
Thermoplastics (PLA, ABS, PETG, TPU, Nylon)
Photopolymer Resins (Standard, Tough, Flexible, Castable)
Polymer Powders (Nylon PA11/PA12, TPU)
Min. Feature Size
~ mm
~ mm
~ mm
Layer Height
mm
mm
mm
Dimensional Accuracy
mm
mm
mm
Surface Finish
Rough, visible layer lines
Very smooth, comparable to injection molding
Slightly rough, grainy matte finish
Strengths
Low cost, easy to use, wide material variety
High resolution, excellent surface finish, high accuracy
High design freedom (no supports), strong functional parts, good for batch production
Weaknesses
Low resolution, anisotropic strength, visible layer lines
Higher cost, messy post-processing, parts can be brittle
Very high equipment cost, long cooling times, grainy surface
Equipment Cost
Low (starts ~)
Medium (starts ~ for professional)
High (starts ~ for benchtop industrial)
Material Cost
Low (~)
Medium (~)
High (~)
Typical Applications
Hobbyist projects, functional prototypes, jigs and fixtures
Visual prototypes, dental models, jewelry patterns, microfluidics
End-use parts, complex geometries, functional prototypes, low-volume production
Post-Processing
Support removal, sanding
Washing in solvent, UV post-curing, support removal
Depowdering, media blasting/tumbling, dyeing
Chapter 6: The Palette of Creation: Materials in Additive Manufacturing
The capabilities of any 3D printing technology are fundamentally defined by the materials it can process. The evolution of additive manufacturing from a tool for creating simple visual models to a viable method for producing functional, end-use parts is primarily a story of advances in materials science. The development of polymers with specific engineering properties—such as high strength, heat resistance, flexibility, and biocompatibility—has unlocked applications in the most demanding industries.7 Each of the core printing technologies relies on a distinct category of materials tailored to its specific fabrication process.
6.1 Thermoplastic Filaments for FDM
FDM printers work with thermoplastics, which are polymers that become molten when heated and solid when cooled. These materials are supplied as long, continuous filaments wound onto spools.4 The range of available filaments is vast, offering a wide spectrum of properties.
Standard Plastics:
PLA (Polylactic Acid): Derived from renewable resources like corn starch, PLA is biodegradable and one of the easiest materials to print with, exhibiting minimal warping. It is a favorite among hobbyists and is ideal for creating prototypes and decorative items that do not require high strength or heat resistance.17
ABS (Acrylonitrile Butadiene Styrene): Known for its strength, durability, and higher temperature resistance, ABS is a popular choice for creating functional parts that need to withstand stress, such as automotive components or electronic enclosures. It is more challenging to print than PLA, often requiring a heated build chamber to prevent warping.17
PETG (Polyethylene Terephthalate Glycol): This material offers a compelling balance of properties, combining much of the ease of printing of PLA with the strength and durability of ABS. It is also known for its chemical resistance and clarity.17
Flexible Filaments:
TPU (Thermoplastic Polyurethane) and TPE (Thermoplastic Elastomer): These are rubber-like materials that provide excellent flexibility and elasticity. They are used to create objects that need to bend or stretch, such as phone cases, gaskets, and wearable items.17
Engineering Filaments:
Nylon (Polyamide): Valued for its exceptional strength, flexibility, and durability, nylon is ideal for printing robust functional parts like gears, living hinges, and other components that require high resilience and wear resistance.17
PC (Polycarbonate): One of the strongest consumer-grade filaments, PC offers outstanding impact resistance and high heat tolerance, making it suitable for creating protective gear and demanding functional prototypes.17
Composite Filaments:
These materials consist of a base thermoplastic (like PLA, ABS, or Nylon) that has been reinforced with short strands of other materials to enhance its properties. Carbon fiber-filled filaments, for example, offer significantly increased stiffness and strength, while glass fiber-filled filaments provide improved durability.17
6.2 Photopolymer Resins for SLA
SLA technology relies on photopolymers, which are liquid resins that solidify when exposed to UV light. These resins are formulated to provide a wide range of optical, mechanical, and thermal properties, often mimicking those of traditional thermoplastics.17
Standard Resins: These are general-purpose resins that offer a good balance of cost, speed, and properties. They are excellent for creating high-detail visual prototypes with a smooth surface finish.17
Tough and Durable Resins: These engineering resins are formulated to simulate the strength and impact resistance of ABS plastic. They are ideal for creating functional prototypes and assemblies that need to withstand mechanical stress.17
Flexible and Elastic Resins: These resins mimic the properties of rubber and silicone, allowing for the creation of parts that can be bent, stretched, and compressed. They are used for applications like gaskets, seals, and ergonomic soft-touch components.17
Specialty Resins: The versatility of resin chemistry has led to the development of highly specialized materials for specific industries. These include castable resins that burn out cleanly, used for creating masters for jewelry and metal casting; biocompatible resins certified for medical and dental applications like surgical guides and hearing aids 29; and high-temperature resins that can withstand heat for applications like injection mold tooling.
6.3 Polymer Powders for SLS
SLS printers primarily use powdered thermoplastics, which are fused together by a laser. The material selection is more limited than for FDM but is focused on producing high-performance, engineering-grade parts.17
Nylon (PA11, PA12): Nylon is the workhorse material for SLS 3D printing. It is a highly capable engineering thermoplastic that offers an excellent combination of strength, durability, and flexibility. Parts printed in nylon are lightweight and stable against impact, chemicals, and heat, making them suitable for a wide range of functional end-use applications. Biocompatible grades of nylon are also available for medical use.17
TPU: Flexible, rubber-like TPU powder is also available for SLS, enabling the production of highly elastic and durable parts without the need for support structures, which is a significant advantage over FDM for creating complex flexible components.16
6.4 Other Material Categories
While this report focuses on polymer-based printing, the field of additive manufacturing extends to a much broader range of materials, highlighting its versatility and growing industrial impact.
Metals: Technologies like Direct Metal Laser Sintering (DMLS) and Selective Laser Melting (SLM) can print with metal powders, including stainless steel, titanium, aluminum, and various alloys. These processes are used to create high-strength, complex parts for the aerospace, automotive, and medical industries.17
Ceramics: Specialized 3D printing processes can create parts from technical ceramics like aluminum oxide and silicon carbide, which offer high heat and wear resistance.32
Glass and Sand: Other technologies can bind materials like sand to create large-scale molds for metal casting or even print optically clear glass components.
The continuous development of new materials is the primary force driving the expansion of 3D printing's applications. As materials scientists create polymers and composites that can meet the stringent performance requirements of industries like aerospace and healthcare, the technology transitions from a prototyping tool into a legitimate and often superior method for manufacturing final products. The future of additive manufacturing is thus inextricably linked to the future of materials science.
Chapter 7: The Final Polish: A Guide to Post-Processing Techniques
7.1 The Necessity of Post-Processing
The automated act of 3D printing is only one part of the manufacturing process. A raw part taken directly from the printer is rarely ready for its final application. Post-processing encompasses all subsequent steps required to clean, finish, and enhance the printed object, transforming it from a rough output into a functional or aesthetically pleasing component.11 These techniques are not merely optional; they are a critical stage of the workflow for improving surface quality, dimensional accuracy, and mechanical properties.13 The specific post-processing steps required are heavily dependent on the printing technology used, the material, and the intended use of the part.
The effort and cost associated with post-processing can be substantial, representing a "hidden factory" within the additive manufacturing workflow. While the printing itself is automated, many finishing steps are manual and labor-intensive, such as sanding or support removal.29 This has a direct impact on the scalability and true cost of production. For example, a complex FDM part with many supports may have a low print cost but a very high labor cost for finishing, making it uneconomical at scale. Conversely, an SLS part has a higher print cost but requires minimal manual labor for post-processing, making it more cost-effective for batch production.14 Therefore, a comprehensive understanding of post-processing is essential for accurately assessing the viability of a 3D printing application.
7.2 Technology-Specific Cleaning and Curing
The first step after a print is complete is to clean the part and remove it from the build environment. This initial process varies significantly between the major printing technologies.
FDM: The primary cleaning step for FDM prints is support removal. For prints that use insoluble supports (made from the same material as the part), this is a manual process that involves carefully breaking away the support structures using tools like pliers, flush cutters, or hobby knives.13 For printers equipped with dual extruders, it is possible to use a soluble support material like PVA (for PLA) or HIPS (for ABS). In this case, the entire print is submerged in a liquid bath (water for PVA, limonene for HIPS), which dissolves the supports away, leaving the main part untouched. This method is less likely to damage the part and is ideal for complex internal geometries.13
SLA: SLA parts emerge from the printer coated in a layer of sticky, uncured liquid resin. This requires a multi-step cleaning and curing process. First, the part must be washed by submerging and agitating it in a solvent, typically isopropyl alcohol (IPA), to dissolve and remove all residual resin.13 After washing and drying, the part is still in a "green" state and has not yet reached its final mechanical properties. It must then be post-cured by exposing it to a combination of UV light and heat in a specialized curing chamber. This final step fully polymerizes the resin, maximizing the part's strength and stability.13
SLS: SLS parts are encased in a block of unsintered powder when the print finishes. The first step is depowdering, which involves excavating the parts from the powder cake and removing all the loose powder from their surfaces. This is typically done manually with brushes and compressed air in a dedicated cleaning station. Automated systems that use vibration or tumbling are also available to streamline this process for batch production.13
7.3 Surface Finishing Techniques
After the initial cleaning, various techniques can be employed to improve the surface finish of the part, primarily by reducing or eliminating the visible layer lines inherent in the printing process.
Sanding: This is the most fundamental and widely used surface finishing technique. It involves manually or mechanically abrading the surface of the part with sandpaper of progressively finer grits. The process typically starts with a coarse grit (e.g., 80-120) to remove major blemishes like support marks, and then moves to finer grits (e.g., 600, 1000, 1500) to smooth the surface. Wet sanding, where the part and sandpaper are kept wet, is often used in the final stages to achieve a glass-like, polished finish.11
Media Blasting and Tumbling: These methods are common for SLS parts. Media blasting involves propelling a stream of abrasive material, such as glass or plastic beads, at the part's surface to remove any remaining powder and create a uniform, smooth matte finish.14 Media tumbling places parts in a vibrating or rotating barrel with abrasive media, which smooths all surfaces simultaneously and is highly effective for processing many parts at once.15
Chemical Vapor Smoothing: This is a more advanced technique used to achieve a glossy, injection-molded appearance, particularly on parts made from ABS or ASA. The part is exposed to a chemical solvent vapor (most commonly acetone for ABS) in a controlled chamber. The vapor condenses on the surface and slightly melts the outer layer of plastic, which flows together to eliminate layer lines. While highly effective, this process must be carefully controlled to avoid melting away fine details.13
7.4 Enhancement and Assembly Processes
Post-processing can also be used to enhance the mechanical properties of a part or to assemble larger objects.
Annealing: This is a thermal treatment that involves heating a 3D printed part to a temperature below its melting point and then cooling it in a controlled manner. This process helps to relieve the internal stresses that build up during printing and can significantly improve the adhesion between layers, resulting in a stronger and more durable part.15
Painting and Dyeing: For a professional aesthetic finish, parts can be painted. This usually involves sanding the surface smooth, applying a layer of primer to fill in small imperfections and create a uniform base, and then applying coats of paint with a brush or spray can.11 Due to their porous nature, SLS parts made from nylon are particularly well-suited to dyeing. The parts are submerged in a heated dye solution, which permeates the material to provide a vibrant, durable color throughout the part.15
Gluing and Welding: 3D printing is often used to create objects that are larger than the printer's build volume. This is achieved by splitting the model into smaller pieces, printing them separately, and then joining them together. Strong adhesives like cyanoacrylate (super glue) or two-part epoxies are commonly used for gluing. For certain plastics like ABS, a solvent like acetone can be used for welding, as it chemically melts the surfaces together to create a very strong bond.13
Chapter 8: The Global Workshop: Navigating Online Model Repositories
8.1 The Role of Digital Marketplaces
The proliferation of 3D printing has been fueled not only by advancements in hardware but also by the growth of a vast digital ecosystem. At the heart of this ecosystem are online model repositories—websites that serve as global libraries and marketplaces for 3D printable files. These platforms are crucial hubs for the 3D printing community, providing a space where designers, engineers, hobbyists, and professionals can share, download, buy, and sell digital designs.12 For many users, these repositories are the primary source of content, offering millions of pre-made models that eliminate the need to design every object from scratch.
8.2 Analysis of Leading Platforms
The landscape of model repositories is dynamic and competitive, with several major platforms catering to different segments of the user base.
Thingiverse: Launched in 2008 by MakerBot Industries, Thingiverse is the oldest and largest repository of 3D models, hosting over two million free-to-download files.35 Its massive library and long history have made it a cornerstone of the maker community. For many years, it has held the top position in user search interest, demonstrating its immense influence and brand recognition.37 However, the platform has been criticized for its aging interface and lack of updates, which has created an opening for newer competitors.37
Printables: Created by Prusa Research, a leading 3D printer manufacturer, Printables has rapidly grown to become a major challenger to Thingiverse's dominance.35 The platform is known for its modern, reliable, and ad-free user experience. It actively fosters community engagement through frequent design contests and a rewarding system for creators.38 While it started as a completely free repository, it has recently introduced the 'Printables Store,' allowing designers to sell their models, signaling a shift towards a hybrid free-and-paid model.38
Cults3D: As a leading independent marketplace, Cults3D has established itself as a premier destination for high-quality designs. It offers a curated selection of both free and paid models, with a strong emphasis on aesthetic and artistic creations.38 The platform is popular among professional designers as it provides a robust system for monetizing their work, claiming to give 80% of revenue back to the creators.38 It supports a wide range of file formats, including STL, OBJ, 3MF, and various CAD files.38
MyMiniFactory: This platform operates as a curated marketplace with a strong focus on quality control. MyMiniFactory guarantees that all models available on its site are 100% printable, having been vetted by both software checks and community testing.38 While it offers many free files, its primary focus is on premium, paid content. It has carved out a significant niche in the tabletop gaming community, offering a vast collection of high-detail miniatures and figurines.35
8.3 Marketplace Dynamics and Ecosystem
The ecosystem of model repositories is maturing, with increasingly sophisticated dynamics and business models.
Free vs. Paid Models: The initial ethos of the maker movement, embodied by Thingiverse, was centered on free and open sharing of designs. While this remains a vital part of the community, there has been a significant shift towards a professionalized "creator economy." Platforms like Cults3D, MyMiniFactory, and now Printables have introduced robust monetization tools, allowing talented designers to earn a living from their creations.35 This incentivizes the production of higher-quality, more complex, and better-documented models, benefiting the entire ecosystem.
Specialized and Professional Repositories: Beyond the general-purpose platforms, several repositories cater to specific professional needs. GrabCAD, for example, is a community for engineers and product designers, hosting a massive library of CAD files, although not all are optimized for 3D printing.35 CGTrader is a large marketplace for professional 3D artists, offering models for gaming, animation, and AR/VR, in addition to a substantial collection of 3D printable files.35
Meta-Search Engines: With millions of models scattered across dozens of websites, finding a specific design can be challenging. This has given rise to meta-search engines like Yeggi, which do not host files themselves but instead index multiple repositories. They function like a Google for 3D models, allowing users to search the entire ecosystem from a single interface and providing links to the original source pages.38 Yeggi is the clear leader among these search services, indexing nearly 5 million models.37
This evolution from a hobbyist-driven sharing culture to a professionalized creator economy marks a significant maturation of the 3D printing market. The initial phase, dominated by Thingiverse, was about establishing a critical mass of content and proving the concept of a shared digital library. The current phase is characterized by a "flight to quality," where users and businesses are increasingly willing to pay for reliable, well-designed, and guaranteed-printable digital assets. This professionalization is not only creating viable career paths for digital designers but is also essential for expanding the use of 3D printing into more critical commercial and industrial applications where quality and dependability are non-negotiable.
Chapter 9: Industry Transformation: Applications of 3D Printing
The true impact of 3D printing is measured by its ability to solve real-world problems and create value in various industries. By fundamentally altering the relationship between design, manufacturing, and cost, additive manufacturing is not just an alternative production method but a catalyst for innovation. Its core value proposition—the decoupling of geometric complexity from manufacturing cost—enables a paradigm shift from the mass production of standardized goods to the mass personalization of tailored solutions. This capability is driving transformative changes in sectors as diverse as aerospace, healthcare, and consumer goods.
9.1 Case Study: Aerospace and Defense
The aerospace industry was one of the earliest adopters of 3D printing and continues to be at the forefront of its application, driven by an relentless pursuit of performance, safety, and efficiency.8 The technology's impact is felt across the entire product lifecycle.
Rapid Prototyping: In an industry where development cycles are long and costly, 3D printing dramatically accelerates the process. Aerospace engineers can now design a component, print a physical prototype in-house, and test its form, fit, and function in a matter of days, rather than the weeks or months required for traditional prototyping methods. This allows for more design iterations in a shorter period, leading to better-optimized and more reliable final parts.8
Tooling, Jigs, and Fixtures: The assembly of an aircraft requires thousands of custom tools, jigs, and fixtures to hold components in place during manufacturing. Traditionally, these tools were machined from metal, an expensive and time-consuming process. By 3D printing these manufacturing aids on-demand using durable polymers, aerospace companies can achieve substantial time and cost savings, reported to be between 60% and 90%.7
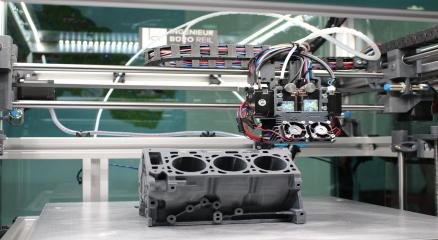
End-Use Parts and Lightweighting: Weight is a critical factor in aircraft design, as it directly impacts fuel efficiency and payload capacity.7 3D printing enables two key strategies for weight reduction. First, lightweighting through topology optimization and generative design creates parts with complex, organic geometries and internal lattice structures that are significantly lighter than their solid counterparts but just as strong.7 Second, part consolidation allows engineers to redesign an assembly of multiple components into a single, complex 3D printed part. This not only reduces weight but also eliminates potential points of failure at joints and fasteners, simplifying assembly and improving reliability.7 As a result, modern commercial aircraft can have over 1,000 3D-printed parts, from non-critical interior components like air ducts and panels to flight-critical metal parts like fuel nozzles and turbine blades.7
9.2 Case Study: Healthcare and Medicine
3D printing is revolutionizing healthcare by enabling an unprecedented level of personalization in patient care. By using medical imaging data from CT or MRI scans as a direct input for the manufacturing process, clinicians can create devices and tools that are perfectly tailored to an individual patient's unique anatomy.3
Patient-Specific Implants: For procedures like cranial or orthopedic reconstruction, surgeons can now use 3D printing to create custom implants that perfectly match the patient's bone structure. This eliminates the need to manually shape and alter standard-sized implants during surgery, which significantly reduces operating time, minimizes complications, and leads to better patient outcomes and faster recovery.3 These implants are often printed in biocompatible materials like titanium or PEEK.5
Custom Prosthetics: Traditional prosthetics are notoriously expensive and can take a long time to manufacture. 3D printing has become a game-changer, particularly for amputees. It allows for the rapid and affordable production of lightweight, custom-fit prosthetic limbs. The ability to quickly create a new prosthetic is especially beneficial for children, who outgrow their devices frequently. The digital nature of the process also allows for a high degree of personalization in the design and color, improving the patient's experience.42
Surgical Planning and Guides: One of the most impactful applications is the creation of precise, 3D-printed anatomical models based on a patient's scans. These models allow surgeons to hold an exact replica of the patient's organ or bone in their hands before an operation. They can use these models to plan complex procedures, practice difficult surgical maneuvers, and anticipate potential challenges. This "dry run" enhances surgical precision, reduces time in the operating room, and ultimately lowers risks for the patient.3 Furthermore, custom surgical guides can be printed to fit perfectly onto a patient's bone, ensuring that cuts and drill holes are made with exact precision.
9.3 Case Study: Consumer Goods
In the consumer goods sector, 3D printing is enabling a shift away from the traditional "one-size-fits-all" model of mass production towards a new era of mass customization and on-demand manufacturing.
Mass Customization: Historically, producing customized products was prohibitively expensive due to the need for unique molds or tooling for each variation. 3D printing eliminates this barrier, as the cost to print one unique item is the same as the cost to print one thousand identical items.1 This has opened the door to mass-market personalized products. Examples include custom-fit earbuds created from a smartphone scan of a person's ear, personalized protective phone cases with unique designs and textures, and even fully 3D-printed footwear tailored to the wearer's foot shape and gait.1
On-Demand Manufacturing: 3D printing allows companies to adopt a "print-on-demand" model, producing goods only after an order has been placed. This radically streamlines the supply chain by minimizing the need for large inventories, reducing waste from unsold products, and allowing for an almost infinite variety of designs to be offered without any upfront tooling costs.1
Complex Geometries for Design Freedom: The technology liberates product designers from the constraints of traditional manufacturing methods like injection molding. They can now create products with intricate patterns, complex internal features, and novel aesthetics that were previously impossible to produce at scale. This unleashes creativity and allows for the development of innovative new products with enhanced functionality and visual appeal.1
Across these diverse industries, a common thread emerges. The fundamental value of 3D printing is its ability to produce complex, customized objects as easily and affordably as simple, standardized ones. This is not merely an incremental improvement on existing manufacturing; it represents a new economic model. It empowers businesses to move beyond the industrial-era paradigm of mass production and embrace a future of highly tailored, on-demand products and services. This has profound implications for every aspect of commerce, from more efficient and sustainable supply chains to more innovative product designs and, most importantly, to solutions and experiences that are perfectly matched to the unique needs of every individual customer or patient.
Conclusion: The Future of Manufacturing
10.1 Key Trends and Future Outlook
The analysis of the end-to-end 3D printing workflow reveals a technology that has matured far beyond its origins in rapid prototyping and is now a significant force in mainstream manufacturing. The trajectory of additive manufacturing is being shaped by several key trends that will define its future impact.
Material Science Innovation: The continued expansion of 3D printing into new applications is fundamentally a materials science challenge. The future will see the development and commercialization of an even broader array of materials with novel properties: polymers with enhanced thermal and mechanical performance, metals with superior strength-to-weight ratios, and advanced composites. The emergence of multi-functional materials—those that are conductive, self-healing, or possess embedded sensing capabilities—will unlock applications that are currently in the realm of science fiction.
AI and Automation: Artificial intelligence is becoming deeply integrated into the workflow. In the design phase, generative design algorithms will continue to evolve, producing ever more sophisticated and optimized solutions with less human input. A critical area for future development is the automation of post-processing. The transition from manual, labor-intensive finishing to fully automated systems for support removal, surface finishing, and quality control is essential for 3D printing to achieve the scalability required for true mass production.
Supply Chain Integration and Distributed Manufacturing: 3D printing is a key enabler of a shift from centralized, global supply chains to a model of distributed, on-demand manufacturing. As the technology becomes more reliable and accessible, it will become increasingly feasible to produce parts and products locally, close to the point of need. This reduces reliance on long-distance shipping, minimizes inventory, and creates more resilient and agile supply chains that can respond rapidly to changing demand.
10.2 Final Recommendations for Adoption and Implementation
For businesses, engineers, and designers looking to leverage the transformative potential of additive manufacturing, a strategic and holistic approach is paramount. Success is not achieved by simply purchasing a 3D printer but by developing a deep, integrated understanding of the entire workflow.
Embrace Design for Additive Manufacturing (DFAM): The greatest value of 3D printing is unlocked during the design stage. Adopters must move beyond simply using the technology to replicate parts designed for traditional manufacturing. Instead, they should actively embrace DFAM principles—leveraging part consolidation, topology optimization, and complex geometries—to create innovative products that are lighter, stronger, and more functional.
Think Holistically About the Workflow: The true cost and lead time of a 3D printed part are determined by the sum of all four stages: modeling, slicing, printing, and post-processing. A comprehensive analysis must account for the labor, time, and capital costs associated with each step. Overlooking the "hidden factory" of post-processing is a common pitfall that can lead to inaccurate cost assessments and failed projects.
Invest in Knowledge, Not Just Hardware: The most critical investment is in the education and training of personnel. A skilled operator who understands the nuances of slicer settings, material properties, and post-processing techniques can produce superior results from a mid-range machine than an unskilled operator with a high-end system. Mastery of the software and processes is the key to maximizing the return on investment in hardware.
Adopt a Technology-Agnostic Approach: No single 3D printing technology is superior in all applications. FDM, SLA, and SLS each have distinct strengths and weaknesses. A strategic adoption of additive manufacturing involves selecting the right tool for the job, matching the specific requirements of the application—be it cost, resolution, or mechanical strength—to the optimal technology and material combination.
By internalizing these principles, organizations and individuals can move beyond viewing 3D printing as a novelty and begin to harness its full potential as a powerful, flexible, and economically disruptive force that is fundamentally reshaping the future of how we design, make, and distribute physical objects.
Works cited
3D Printing in consumer electronics | Dassault Systèmes, accessed October 14, 2025, https://www.3ds.com/make/solutions/industries/3d-printing-consumer-electronics
3D Printing Technology in Aerospace Industry – A Review - Scholarly Commons, accessed October 14, 2025, https://commons.erau.edu/cgi/viewcontent.cgi?article=1708&context=ijaaa
3D Printing in Healthcare: Use Cases & Benefits - Appinventiv, accessed October 14, 2025, https://appinventiv.com/blog/3d-printing-in-healthcare/
SLA vs. FDM: Comparing Common 3D Printing Technologies - Protolabs, accessed October 14, 2025, https://www.protolabs.com/resources/blog/prototyping-technologies-for-3d-printing-sla-vs-fdm/
Medical Applications of 3D Printing and Standardization Issues - PMC, accessed October 14, 2025, https://pmc.ncbi.nlm.nih.gov/articles/PMC10409621/
Maximizing your 3D Printing Workflow - 3YourMind, accessed October 14, 2025, https://www.3yourmind.com/hubfs/3YOURMINDSolidEdgeMaximizing3DPrinting.pdf
3D Printing in Aerospace: Revolutionizing Part Manufacturing ..., accessed October 14, 2025, https://prototek.com/article/3d-printing-in-aerospace-revolutionizing-component-manufacturing/
How Additive Manufacturing Is Changing Aerospace Production, accessed October 14, 2025, https://www.aerodefevent.com/news/additive-manufacturing-aerospace/
3D Printing for Aerospace: Prototyping and Tooling - Xometry, accessed October 14, 2025, https://www.xometry.com/resources/3d-printing/3d-printing-aerospace-prototyping-and-tooling/
HOW 3D PRINTING IS CHANGING THE AEROSPACE INDUSTRY - Bowman 3D, accessed October 14, 2025, https://www.bowman3d.com/blog/how-3d-printing-is-changing-the-aerospace-industry
How to 3D Print: A Step-By-Step Guide of 3D Printing - Raise 3D, accessed October 14, 2025, https://www.raise3d.com/academy/how-to-3d-print-a-step-by-step-guide-of-3d-printing/
Workflow: Basics of 3D Design and 3D Printing : 7 Steps (with Pictures) - Instructables, accessed October 14, 2025, https://www.instructables.com/Into-to-3D-Design-and-3D-Printing/
Post-processing in 3D printing|Beamler, accessed October 14, 2025, https://www.beamler.com/post-processing-3d-printing/
FDM vs. SLA vs. SLS: Which 3D Printer Is Easiest to Use? - YouTube, accessed October 14, 2025, https://www.youtube.com/watch?v=4wHonWbx3fo
The Complete Guide to 3D Printing Post Processing - Wevolver, accessed October 14, 2025, https://www.wevolver.com/article/the-ultimate-guide-to-3d-printing-post-processing-techniques
FDM vs SLA vs SLS: The Ultimate 3D Printing Comparison - Jaycon ..., accessed October 14, 2025, https://www.jaycon.com/fdm-vs-sla-vs-sls-the-ultimate-3d-printing-comparison/
3D Printing Materials: Guide to Filament & Resin Types for 3D ..., accessed October 14, 2025, https://www.raise3d.com/blog/3d-printing-materials/
3D CAD Software for 3D Printing | SOLIDWORKS for Makers, accessed October 14, 2025, https://www.solidworks.com/solution/solidworks-makers/3d-cad-printing-software
3D Modeling Software for 3D Printing | Autodesk, accessed October 14, 2025, https://www.autodesk.com/solutions/3d-modeling-for-3d-printing
3D Design Software | 3D CAD Design - Autodesk, accessed October 14, 2025, https://www.autodesk.com/solutions/3d-design-software
3MF file format and why it's great - Original Prusa 3D Printers, accessed October 14, 2025, https://blog.prusa3d.com/3mf-file-format-and-why-its-great_30986/
3D Printing File Formats Compared: STL, AMF, 3MF and OBJ | Xometry Pro, accessed October 14, 2025, https://xometry.pro/en/articles/3d-printing-file-formats/
Understanding 3D Printer File Formats (STL, OBJ, 3MF, and more) - Wevolver, accessed October 14, 2025, https://www.wevolver.com/article/3d-printer-file-formats-stl-obj-3mf
Last Guide to 3D Print File Type You'll Ever Need – einstar, accessed October 14, 2025, https://www.einstar.com/blogs/einstar-academy/3d-print-file-type
Understanding G-code 3D Printing: Essential Commands and Slicer ..., accessed October 14, 2025, https://www.3dmag.com/3d-wikipedia/g-code-3d-printing-commands-slicer-output/
Slic3r - Open source 3D printing toolbox, accessed October 14, 2025, https://slic3r.org/
Beginners Guide to 3D Printing G-Code Commands | Simplify3D, accessed October 14, 2025, https://www.simplify3d.com/resources/articles/3d-printing-gcode-tutorial/
G-Code 3D Printing Commands: Tutorial, List & How to Use Them - JLC3DP, accessed October 14, 2025, https://jlc3dp.com/blog/g-code-3d-printing-commands-tutorial-list-how-to-use-them
SLA vs SLS vs FDM: comprehensive 3D printing comparison - Sinterit – Professional SLS 3D Printers & Accessories, accessed October 14, 2025, https://sinterit.com/blog/sls-technology/fdm-vs-sla-vs-sls-comparison/
Introduction to Medical 3D Printing and 3D Printers for Healthcare | Formlabs, accessed October 14, 2025, https://formlabs.com/blog/3d-printing-in-medicine-healthcare/
3D Printing Aerospace | Dassault Systèmes, accessed October 14, 2025, https://www.3ds.com/make/solutions/industries/3d-printing-aerospace
Guide to Materials Used in 3D Printing | SPC - Sharretts Plating, accessed October 14, 2025, https://www.sharrettsplating.com/blog/materials-used-3d-printing/
www.google.com, accessed October 14, 2025, https://www.google.com/search?q=materials+used+in+3D+printing
POST-PROCESSING YOUR 3D PRINTS, accessed October 14, 2025, https://www.unthsc.edu/center-for-innovative-learning/wp-content/uploads/sites/35/2018/10/Posteprocessing3dprints.pdf
Top 10 Thingiverse Alternatives of 2025 - Creality Cloud, accessed October 14, 2025, https://www.crealitycloud.com/blog/reviews/alternatives-to-thingiverse
Thingiverse - Digital Designs for Physical Objects, accessed October 14, 2025, https://www.thingiverse.com/
What is the Most Popular 3D Model Repository? - Fabbaloo, accessed October 14, 2025, https://www.fabbaloo.com/news/what-is-the-most-popular-3d-model-repository
2024 Best Thingiverse Alternatives For 3D Printing STL Files - anycubic-store, accessed October 14, 2025, https://store.anycubic.com/blogs/3d-printing-guides/best-thingiverse-alternatives-for-3d-printing
Cults・Download free 3D printer models・STL, OBJ, 3MF, CAD, accessed October 14, 2025, https://cults3d.com/en
Top 20 Websites to Download STL Files for 3D Printing, accessed October 14, 2025, https://www.dobot-robots.com/insights/news/top-20-websites-to-download-stl-files-for-3d-printing.html
How Medical 3D Printing is Advancing the Healthcare Industry | Vaughn College, accessed October 14, 2025, https://www.vaughn.edu/blog/how-medical-3d-printing-is-advancing-the-healthcare-industry/
3D Printing in Medicine and Healthcare | Xometry, accessed October 14, 2025, https://www.xometry.com/resources/3d-printing/3d-printing-in-medicine-and-healthcare/
3D Printing Impacts in Healthcare and Prosthetics - CBS Medical Billing, accessed October 14, 2025, https://www.cbsmedicalbilling.com/3d-printing-impacts-in-healthcare-and-prosthetics/
5 Companies Making Real Products with 3D Printing - YouTube, accessed October 14, 2025, https://www.youtube.com/watch?v=cBVgwIjP02w
A Beginner's Guide to 3D Printer Filament
The journey into 3D printing begins with understanding the core technology and the material that brings digital designs to life. For the vast majority of hobbyists and professionals, this technology is Fused Deposition Modeling (FDM), and the material is a thermoplastic filament. This section establishes the fundamental principles of how these printers work and the critical role filament plays in the process.
The Additive Manufacturing Process: How FDM/FFF Printers Work
3D printing is a form of additive manufacturing, a process that builds three-dimensional objects from a digital file by adding material one layer at a time.1 This is in contrast to traditional subtractive manufacturing methods, like machining, which remove material from a larger block. The most common and accessible type of 3D printing is known as Fused Deposition Modeling (FDM) or Fused Filament Fabrication (FFF).2 While the terms are often used interchangeably, FDM® is a registered trademark of the company Stratasys, which pioneered the technology in 1989, making FFF the more generic term for the process.2
The FDM/FFF process is conceptually simple. It begins with a spool of solid plastic wire, called filament. This filament is fed into a heated printer component called an extruder head, where it is melted to a semi-liquid state. The printer, guided by a computer file, moves this extruder head precisely in three dimensions, depositing the molten plastic onto a build platform layer by successive layer. Each layer fuses to the one below it as it cools and solidifies, gradually constructing the final object.3
The materials used in this process are known as thermoplastics. These are polymers that become soft and malleable when heated to a specific temperature and then turn solid once cooled. Crucially, this process is reversible, meaning thermoplastics can be heated, shaped, and cooled multiple times, which is the property that makes them ideal for FDM printing.2
From Spool to Nozzle: The Journey of a Filament
The heart of an FDM printer is its extrusion system, which is responsible for melting the raw material and forming it into a continuous profile.3 This system can be broken down into two main parts: the "cold end" and the "hot end".3
The cold end is responsible for gripping the filament and feeding it from the spool. It uses a gear- or roller-based mechanism driven by a stepper motor to precisely control the feed rate, pushing the solid filament toward the hot end.3
The hot end is where the melting happens. It consists of a heating chamber, often called a liquefier, which melts the filament. At the tip of the hot end is a nozzle, a small metal component with a tiny hole through which the molten plastic is extruded. As the plastic exits the nozzle, it forms a thin, tacky bead that adheres to the build platform or the previously printed layer.3 Nozzles come in various diameters, typically ranging from 0.3 mm to 1.0 mm, and are made from different materials. A standard brass nozzle is sufficient for printing common plastics like PLA and ABS. However, for more advanced "composite" filaments containing hard particles like carbon fiber, a hardened steel nozzle is required to resist abrasion.3 This distinction introduces an important concept for beginners: material choice can dictate hardware requirements.
A Critical Choice: 1.75mm vs. 2.85mm Filament Diameter Explained
One of the first and most fundamental choices a new user faces is the filament diameter. Filaments are predominantly available in two standard sizes: 1.75 mm and 2.85 mm (often referred to as 3 mm).6 It is critical to understand that these sizes are not interchangeable. A 3D printer's entire extrusion path—from the feeder gears to the hot end and nozzle—is engineered to work with only one specific diameter.6 Using the wrong size will inevitably lead to jams, poor print quality, and potential damage to the printer.
The decision of which diameter to use is therefore dictated by the printer's design. For a beginner, the choice is simple: check the printer's specifications and purchase the corresponding filament.9 However, understanding the market dynamics behind these standards provides valuable context.
1.75mm Filament: This diameter is the dominant global standard for consumer and prosumer 3D printers, with some estimates suggesting over 85% of these printers are designed for it.10 Its widespread adoption has created a powerful feedback loop. Because most printers use 1.75mm, filament manufacturers focus their production on this size. This leads to intense competition and innovation, resulting in a significantly broader range of material types, colors, and specialty blends, as well as lower costs.6 For a beginner, a printer that uses 1.75mm filament provides the greatest access to the most affordable and diverse material ecosystem.
2.85mm Filament: This size is the modern descendant of the original "3.0mm" filament and is less common in the desktop market. It is primarily used by certain brands, particularly those with long "Bowden" style extruder tubes, where the thicker, stiffer filament is less prone to bending or buckling over the long travel path.9 While perfectly functional, the smaller market share means there are fewer material options available, and they can be slightly more expensive.10
Ultimately, the choice of filament diameter is less a matter of performance preference and more a fundamental hardware constraint that has significant downstream effects on material availability and cost. For those new to the field, the prevalence of 1.75mm printers makes this the de facto starting point.
The Essentials – A Deep Dive into Your First Filaments
Navigating the world of 3D printing filaments can be daunting, with a sea of acronyms and technical specifications. However, a beginner's journey almost always starts with one of three core materials: PLA, ABS, or PETG. This section provides a detailed profile of each, outlining their properties, strengths, weaknesses, and ideal applications to help you make an informed choice for your first prints.
To provide a quick overview, the following table summarizes the key characteristics of the most common filaments.
Table 1: Quick-Reference Properties of Common Filaments
Filament
Ease of Use (1-10)
Strength
Durability
Flexibility
Nozzle Temp (°C)
Bed Temp (°C)
Enclosure Needed?
Fumes/Odor
PLA
9
Medium
Low
Low
180-220
20-60 (Optional)
No
Minimal
ABS
4
High
High
Medium
210-250
90-110 (Required)
Recommended
Strong/Toxic
PETG
7
High
High
Medium
220-250
50-90 (Required)
No
Minimal
TPU
3
Low
Very High
Very High
210-240
30-60
No
Minimal
Nylon
4
Very High
Very High
High
240-290
55-115
Recommended
Minimal
1
PLA (Polylactic Acid): The Undisputed Starting Point
What it is: Polylactic Acid, or PLA, is a biodegradable thermoplastic derived from renewable resources like cornstarch, tapioca roots, or sugarcane.1 This makes it one of the most environmentally friendly filaments available.14
Properties & Characteristics:
Ease of Use: PLA is universally regarded as the perfect filament for beginners due to its forgiving nature and simple printing requirements.15 It prints at relatively low temperatures (typically 180-220°C) and is far less prone to warping than other materials.1 A key advantage is that it does not strictly require a heated print bed, which simplifies the setup process for entry-level machines.1
Mechanical Properties: PLA is characterized by high tensile strength (approximately 50-70 MPa) and high stiffness, which makes printed parts feel very rigid.13 However, this rigidity comes at a price: PLA has low impact resistance, making it brittle. Parts made from PLA are more likely to shatter or snap when dropped or subjected to sudden force.4
Thermal Properties: PLA has a low glass transition temperature of around 55-60°C.19 This is the temperature at which the material begins to soften and deform. Consequently, PLA parts are unsuitable for use in hot environments, such as the interior of a car on a sunny day or for components near motors or electronics.18
Aesthetics: One of PLA's greatest strengths is its ability to produce prints with excellent visual quality. It renders smooth surfaces, captures sharp details, and is available in a vast spectrum of colors and specialty finishes, including "Silk" (glossy), "Matte", and translucent varieties.12
Pros for the Beginner:
Extremely easy to print with minimal issues.15
Low cost and widely available from numerous manufacturers.1
Emits a faint, slightly sweet smell during printing, and is considered non-toxic.1
Biodegradable under industrial composting conditions.1
No heated bed or enclosure is required for successful prints.23
Cons for the Beginner:
Brittle and not suitable for parts that need to withstand impacts.16
Poor heat resistance; will deform at relatively low temperatures.19
Susceptible to degradation from moisture and UV light, making it unsuitable for outdoor applications.21
Applications: PLA is the ideal choice for creating visual prototypes, concept models, architectural models, decorative figurines, desk toys, and any low-stress functional parts intended for indoor use.1
Optimal Printer Settings:
Nozzle Temperature: 180-220°C 24
Bed Temperature: 20-60°C (optional, but recommended if available) 24
Cooling Fan: On 24
ABS (Acrylonitrile Butadiene Styrene): Strength at a Cost
What it is: ABS is a durable, petroleum-based thermoplastic that has long been a staple in traditional manufacturing for products like LEGO bricks, automotive interiors, and electronic enclosures.16 It is not biodegradable.20
Properties & Characteristics:
Ease of Use: ABS is considered a difficult material for beginners.12 Its challenging nature stems directly from its thermal properties. ABS undergoes significant thermal contraction as it cools, making it extremely prone to warping (where the corners of the print lift off the bed) and cracking between layers.1 Successful printing requires a heated bed, a controlled printing environment (ideally an enclosed printer), and careful management of temperature.28 Furthermore, it emits potentially toxic styrene fumes during printing, necessitating good ventilation.1
Mechanical Properties: The primary reason to use ABS is its mechanical performance. It is significantly tougher and more ductile than PLA, with exceptional impact strength and good wear resistance.4 While its tensile strength (34-36 MPa) is lower than PLA's, it can bend and deform much more before failing, making it far less brittle.19
Thermal Properties: ABS boasts excellent heat resistance, with a high glass transition temperature of approximately 105°C.16 This makes it a superior choice for functional parts that will be exposed to elevated temperatures.26
Post-Processing: ABS parts can be easily sanded, machined, painted, and glued.4 A unique and powerful feature of ABS is its solubility in acetone. This allows for a post-processing technique called "acetone vapor smoothing," where exposure to acetone vapor melts the surface of the print, eliminating layer lines and creating a smooth, glossy finish that resembles an injection-molded part. Acetone can also be used to chemically weld ABS parts together, creating incredibly strong bonds.17
The difficulty of printing with ABS is not an arbitrary flaw but a direct consequence of the same physical property that gives it high heat resistance. Its high glass transition temperature requires a high printing temperature. This large difference between the extruded plastic's temperature and the surrounding environment leads to rapid cooling and significant shrinkage, which is the physical root cause of warping.30 To combat this, hardware solutions like a heated bed and an enclosure are needed to slow down and control the cooling rate.
Pros:
High strength, toughness, and impact resistance.1
Excellent heat resistance for functional applications.19
Versatile post-processing options, including acetone vapor smoothing.4
Cons:
Difficult to print due to severe warping and cracking.1
Requires a heated bed and a printer enclosure for best results.24
Emits strong, potentially harmful fumes during printing.1
Applications: ABS is used for creating durable functional parts, such as mechanical components, automotive trim, protective housings, interlocking parts like gears, and any object that requires good heat and impact resistance.17
Optimal Printer Settings:
Nozzle Temperature: 210-250°C 24
Bed Temperature: 90-110°C (required) 24
Enclosure: Highly recommended 23
Cooling Fan: Off or on a very low setting to prevent warping.28
PETG (Polyethylene Terephthalate Glycol): The Best of Both Worlds?
What it is: PETG is a durable thermoplastic polymer that is a glycol-modified version of PET, the plastic used to make water bottles.32 In the 3D printing world, it is often positioned as an ideal intermediate material, combining much of the ease of printing of PLA with the strength and durability of ABS.15
Properties & Characteristics:
Ease of Use: PETG is significantly easier to print than ABS, exhibiting very little warping.12 However, it can be more challenging than PLA. Its primary printing quirk is a tendency to be "stringy," leaving fine, hair-like strands (similar to a spider web) between separate parts of a print.12 This requires careful tuning of printer settings, specifically retraction. It is also known to be hygroscopic, meaning it readily absorbs moisture from the air, which can degrade print quality.20
Mechanical Properties: PETG offers an excellent balance of properties. It is stronger and more durable than PLA, with superior impact resistance that makes it far less brittle.19 Its tensile strength of 40-50 MPa is comparable to PLA, but it has better flexibility, allowing it to bend under load without breaking.19
Thermal Properties: With a glass transition temperature around 80-85°C, PETG has significantly better heat resistance than PLA, though not as high as ABS.19
Other Properties: PETG is known for its excellent chemical resistance, water resistance, and good UV resistance, making it a suitable choice for parts used outdoors.19 It also possesses good optical qualities, enabling the creation of transparent or translucent prints.4 Certain grades of PETG can be certified as food-safe, expanding its range of applications.16
Pros:
Combines good strength, durability, and flexibility.34
Good temperature, chemical, and UV resistance.35
Easy to print with low warping and minimal odor.12
An excellent "step-up" material for those who have mastered PLA.15
Cons:
Prone to stringing, requiring careful slicer tuning.12
Can absorb moisture from the air (hygroscopic), requiring proper storage.20
Can adhere very strongly to some build surfaces like glass, potentially causing damage upon removal.20
Applications: PETG is a versatile workhorse material suitable for a wide range of applications, including functional mechanical parts, protective components, snap-fit enclosures, waterproof items, food-safe containers (if certified), and parts for outdoor use.32
Optimal Printer Settings:
Nozzle Temperature: 220-250°C 24
Bed Temperature: 50-90°C (required) 25
Cooling Fan: On, often at a lower speed (e.g., 50%) than for PLA.33
Head-to-Head Analysis: Choosing Between PLA, ABS, and PETG
Understanding the individual characteristics of PLA, ABS, and PETG is the first step. The next is learning how to choose the right one for a specific project. This requires a direct comparison of their properties, as there is no single "best" filament; the optimal choice is always dependent on the application's demands.
Strength and Durability Showdown
The term "strength" in 3D printing is not a single value but a collection of properties describing how a material behaves under different types of stress. A beginner asking "Which filament is strongest?" must first learn to ask, "What kind of stress will my part experience?".
Tensile Strength (Resistance to Pulling): This measures a material's ability to withstand being pulled apart. Here, PLA is the surprising leader, with a tensile strength of 50-60 MPa, making it the most rigid of the three.19 PETG is a close second at 40-50 MPa, while ABS is the lowest at 34-36 MPa.19 For a static object that needs to resist a constant pulling force without stretching, PLA is technically the strongest.
Impact Resistance (Toughness): This property describes a material's ability to absorb sudden energy, like from a drop or an impact. In this category, the roles are completely reversed. ABS is the undisputed champion, known for its exceptional toughness and ability to absorb shocks without shattering.19 PETG also performs very well, offering a great balance of properties and being significantly tougher than PLA.21 PLA, due to its rigidity, has poor impact resistance and is considered brittle; it is likely to crack or shatter on impact.4
Flexibility and Ductility: This refers to a material's ability to bend or deform under stress before it fails. Both ABS and PETG are considered ductile materials; they have some "give" and will flex before breaking.19 This makes them ideal for applications like snap-fit enclosures or parts that need to absorb some vibration. PLA is very rigid and will snap cleanly with little to no bending.21
Environmental and Practical Considerations
Temperature Resistance: For any part that will be used in a warm environment, temperature resistance is a critical factor. There is a clear hierarchy among the three materials. ABS has the highest heat resistance, with a heat deflection temperature around 98°C.19 PETG is in the middle, with a resistance of about 70-85°C.19 PLA is the least resistant, beginning to deform at temperatures as low as 55°C.19 This makes PLA unsuitable for parts left in a car or used on outdoor equipment in the sun.
UV and Chemical Resistance: For outdoor applications, resistance to sunlight (UV radiation) and weathering is paramount. Both PETG and ABS significantly outperform PLA in this regard.19 PETG is often cited as the best all-around choice for outdoor use due to its excellent UV, water, and chemical resistance.21
Printability and Hardware Requirements: A summary of the practical challenges is essential. PLA is the easiest, often working "out of the box" with minimal tuning and no special hardware. PETG is moderately difficult, requiring a heated bed and careful adjustment of retraction settings to manage stringing. ABS is the most challenging, demanding a high-temperature heated bed, a printer enclosure to prevent warping, and good ventilation to manage fumes.19
Fumes and Safety: PLA is derived from plant matter and is largely odorless and considered safe for printing in a home or office environment without special ventilation.1 PETG is also mostly odorless during printing.33 ABS, being a petroleum-based plastic, releases styrene gas when heated, which has a strong, unpleasant odor and is a potentially toxic volatile organic compound (VOC). Printing with ABS requires a well-ventilated workspace.1
The following table provides a detailed, side-by-side comparison to aid in material selection.
Table 2: In-Depth Comparison of PLA vs. ABS vs. PETG
Feature
PLA
ABS
PETG
Tensile Strength (MPa)
50-60 (High)
34-36 (Moderate)
40-50 (High)
Impact Resistance
Low (Brittle)
High (Tough)
High (Tough)
Heat Deflection Temp (°C)
~55-60°C (Low)
~98-105°C (High)
~70-85°C (Medium)
Flexibility/Ductility
Low (Rigid)
Medium (Ductile)
Medium (Ductile)
UV Resistance
Poor
Average
Good
Warping Tendency
Minimal
High
Minimal
Fumes/Odor
Minimal (Slightly sweet)
Strong (Potentially toxic)
Minimal
Heated Bed Required?
No (Optional)
Yes (90-110°C)
Yes (50-90°C)
Enclosure Recommended?
No
Yes
No
Ease of Printing
Very Easy
Difficult
Moderately Easy
Best For...
Visual models, prototypes, decorative items, low-stress indoor parts.
Functional parts needing high heat and impact resistance (e.g., car parts).
Durable functional parts, outdoor items, food-safe containers, mechanical components.
19
Expanding Your Material Palette: An Introduction to Specialty Filaments
Once the fundamentals of printing with PLA, ABS, and PETG are mastered, a vast world of specialty filaments opens up, offering unique properties for specific applications. These materials can provide flexibility, extreme strength, unique aesthetics, or specialized functionalities. This section serves as an introduction to some of the most popular categories of advanced filaments.
Printing with Flexibility: An Overview of TPU and TPE
What they are: Thermoplastic Elastomers (TPE) are a class of polymers that behave like rubber, known for their elasticity and ability to stretch and bend without breaking. Thermoplastic Polyurethane (TPU) is the most common type of TPE used in 3D printing.39 These materials are defined by their Shore Hardness rating (e.g., 95A, 85A), where a lower number indicates a softer, more flexible material.40
Key Properties: TPU is highly durable, resistant to abrasion and impacts, and can often be stretched to over 500% of its original size before breaking.15
Printing Challenges: The very flexibility that makes TPU useful also makes it notoriously difficult to print. The soft filament can easily bend, kink, or coil inside the extruder mechanism, leading to jams. For this reason, a "direct-drive" extruder, where the feeder gears are located directly on top of the hot end, is strongly recommended for printing flexible filaments.16 Printing must be done at very slow speeds (typically 20-30 mm/s) to maintain control, and retraction settings must be carefully tuned or even disabled to prevent the filament from jamming.16
Applications: TPU is used to create any object that needs to be flexible, soft, or shock-absorbent. Common applications include phone cases, gaskets and seals, flexible joints, wearables, and non-slip feet for devices.4
Engineering-Grade Performance: High-Strength Nylon, PC, and ASA
For applications that demand the highest levels of mechanical and thermal performance, printers turn to engineering-grade filaments.
Nylon (Polyamide): Nylon is renowned for its exceptional combination of strength, flexibility, and durability. It is incredibly tough, with high impact and wear resistance, making it an ideal choice for functional mechanical parts like gears, living hinges (thin sections designed to flex repeatedly), and brackets.1 Nylon also has good heat and chemical resistance.1 Its main drawback is that it is extremely hygroscopic, meaning it absorbs moisture from the air very quickly. Printing with "wet" nylon is nearly impossible, so it must be kept in a sealed, dry environment at all times.23
Polycarbonate (PC): PC is one of the strongest and most heat-resistant filaments available to consumers. It is the same type of plastic used to make bulletproof glass and is valued for its immense impact strength.1 However, it is very difficult to print, requiring extremely high nozzle temperatures (often approaching 300°C) and a heated enclosure to combat severe warping.1
ASA (Acrylonitrile Styrene Acrylate): ASA can be thought of as a superior, weather-resistant version of ABS.12 It shares ABS's excellent strength, toughness, and heat resistance but adds superior resistance to UV radiation and weathering.4 This makes ASA the perfect material for functional parts intended for long-term outdoor use, such as garden tools, external automotive components, or signage. It shares the same printing difficulties as ABS, requiring high temperatures, a heated bed, and an enclosure to manage warping and fumes.12
Aesthetic and Functional Composites: Wood-Fill, Metal-Fill, and Carbon Fiber-Reinforced Filaments
Composite filaments are created by mixing a base plastic (usually PLA) with fine particles of another material to achieve unique aesthetic or mechanical properties.
Wood-Fill: These filaments combine a PLA base with around 30% fine wood dust, cork, or bamboo particles.46 The resulting prints have a look, feel, and even a smell similar to real wood.46 The layer lines inherent in FDM printing can even mimic the appearance of a natural wood grain.48 Wood-fill filaments are less abrasive than other composites but can be prone to clogging, sometimes benefiting from a slightly larger nozzle diameter (e.g., 0.5 mm or 0.6 mm).46 They are primarily used for decorative items, architectural models, and cosplay props.47
Metal-Fill: These filaments infuse a base plastic with fine metal powders like bronze, copper, brass, or stainless steel.48 Prints made from these materials are significantly heavier than standard plastic parts and have a cold, metallic feel. After printing, they can be sanded, polished, and even patinated to create a realistic metallic shine. It's important to note that these filaments are not electrically conductive; the plastic matrix insulates the metal particles.48
Carbon Fiber-Reinforced: These advanced filaments add short, chopped carbon fibers to a high-performance base material like PLA, PETG, or Nylon.1 The carbon fibers dramatically increase the stiffness, strength, and dimensional stability of the base plastic, creating parts that are exceptionally strong and lightweight.5 However, these filaments introduce a new challenge: abrasiveness. The hard carbon fibers act like sandpaper on the inside of a standard brass nozzle, rapidly wearing it out and destroying its precise opening. Printing with carbon fiber-reinforced filament is not just a matter of changing software settings; it requires a physical hardware upgrade to a hardened steel nozzle to prevent damage to the printer.3 These materials are used for high-performance applications like drone frames, R/C car parts, and functional engineering prototypes.5
The Magic of Dual Extrusion: Soluble Support Filaments (PVA and HIPS)
FDM printing builds objects from the bottom up, which means that severe overhangs or complex internal geometries require temporary "support structures" to be printed underneath them. Removing these supports can be difficult and can leave marks on the final print. Dual-extrusion printers, which have two separate nozzles, can solve this problem by printing the main model in one material and the supports in a special soluble filament.
PVA (Polyvinyl Alcohol): PVA is a unique material that dissolves completely in regular tap water.1 When used as a support material, the finished print can simply be submerged in a container of water. Over a few hours, the PVA supports will wash away, leaving behind a perfectly clean model with complex geometries that would be impossible to produce otherwise.1
HIPS (High Impact Polystyrene): HIPS is often paired with ABS. It has similar printing temperatures to ABS but dissolves in a specific citrus-based solvent called limonene, which does not harm the ABS model.4 This allows for the creation of complex ABS parts with easily removable supports.
The Professional's Secret: Filament Care and Management
A common source of frustration for beginners is when a previously reliable printer suddenly starts producing poor-quality prints. Often, the culprit is not the machine or the settings, but the filament itself. Many users overlook a critical aspect of 3D printing: filament is not an inert material. It is susceptible to environmental conditions, and proper care is essential for achieving consistent, high-quality results. This section details the science behind filament degradation and the best practices for storage and management.
Understanding Hygroscopy: Why "Wet" Filament Fails
Most common 3D printing filaments are hygroscopic, which is the scientific term for a material's tendency to absorb moisture from the surrounding air.41 The degree of hygroscopy varies significantly between materials. Engineering plastics like Nylon and flexible filaments like TPU are extremely hygroscopic and can be ruined by just a few hours of exposure to humid air.44 Materials like PLA and PETG are moderately hygroscopic, while ABS is less so, but all will absorb moisture over time.50
When this "wet" filament is fed into the printer's hot end, the trapped water molecules rapidly boil and turn into steam. This process has several destructive effects on the print:
Audible Popping/Sizzling: You may hear distinct crackling or popping sounds coming from the nozzle as the steam escapes.44
Poor Surface Finish: The steam creates bubbles within the extruded plastic, resulting in a rough, uneven, or even foamy surface texture.44
Stringing and Oozing: The expanding steam can force molten plastic out of the nozzle during travel moves, leading to severe stringing.49
Weak Layer Adhesion: The bubbles and inconsistent extrusion prevent the layers from bonding properly, resulting in prints that are extremely weak and brittle.44
Chemical Degradation: The moisture can also cause a chemical reaction called hydrolysis at high temperatures, which breaks down the polymer chains and makes the filament itself brittle and more prone to snapping.44
Treating filament as a perishable good with a limited "environmental shelf life" is a crucial mindset shift. The clock starts ticking the moment the vacuum-sealed bag is opened. This explains a huge category of "mystery" print failures and provides a clear path to prevention.
Best Practices for Filament Storage: Dry Boxes, Vacuum Bags, and DIY Solutions
The key to preventing filament degradation is to store it in a controlled, low-humidity environment, ideally below 20% relative humidity.54
Airtight Containers with Desiccant: One of the most effective and popular methods is to store spools in large, sealable plastic bins. To absorb any moisture trapped inside, packs of desiccant, such as silica gel, should be added to the container.52 Many silica gel products are reusable and can be "recharged" by baking them in an oven to drive off the absorbed moisture.56
Vacuum-Sealed Bags: For long-term storage or for highly sensitive materials, vacuum-sealing is an excellent option. This process removes most of the air from the bag, providing superior protection against both moisture and dust. Many manufacturers now sell reusable vacuum bags designed specifically for filament spools.52
Commercial Dry Boxes: Dedicated filament dry boxes are commercially available products that not only provide a sealed, low-humidity environment but often include a built-in heater to actively dry the filament. Many of these systems also function as dispensers, allowing you to print directly from the box, which is critical for keeping materials like Nylon dry during very long prints.54
A Guide to Drying Filament: Temperatures and Times for Common Materials
If a spool of filament has already absorbed moisture, it can often be salvaged by drying it. This is typically done using a dedicated filament dryer, a food dehydrator, or a conventional oven set to a very low temperature.49 It is absolutely critical that the drying temperature remains below the material's glass transition temperature (Tg); otherwise, the filament on the spool will soften and fuse into an unusable block.
The following chart provides general guidelines for drying common filaments. Always consult the manufacturer's recommendations for your specific material.
Filament
Drying Temperature
Drying Time
PLA
45-55°C
4-6 hours
PETG
60-65°C
4-6 hours
ABS
~80°C
6 hours
TPU
50-55°C
~12 hours
Nylon
70-80°C
8-12 hours
PVA
45-55°C
6-8 hours
44
A Beginner's Troubleshooting Guide to Filament-Related Issues
Even with the best preparation, print failures are an inevitable part of the learning process in 3D printing. Understanding how to diagnose and solve the most common filament-related problems is a critical skill. This section provides a practical, problem-oriented guide to help you identify and fix these issues.
Problem: Warping and Poor Bed Adhesion
Description: This is one of the most common failures, where the corners or edges of the print lift and curl upwards, detaching from the build plate. In severe cases, the entire print can come loose. The first layer may also fail to stick to the bed at all.30
Primary Causes:
Thermal Contraction: This is the root physical cause. As the extruded plastic cools, it shrinks. With materials that print at high temperatures, like ABS, the upper layers cool and shrink more rapidly than the base, creating internal stress that pulls the corners of the print inward and upward.30
Improper First Layer / Z-Offset: The nozzle is too far from the print bed. For the first layer to adhere, the molten filament needs to be gently "squished" onto the surface. If the gap is too large, the filament is just laid on top and won't bond.61
Contaminated Bed Surface: Oils from fingerprints, dust, or residue from previous prints can create a barrier that prevents the filament from sticking.58
Step-by-Step Solutions:
Clean the Build Plate: Before every print, thoroughly wipe the build surface with Isopropyl Alcohol (IPA) with a concentration of 70% or higher to remove any oils or dust.61
Level the Bed and Set Z-Offset: This is the most critical calibration step. Meticulously level your print bed according to your printer's instructions. Then, as the first layer begins to print, fine-tune the "Z-offset" (the nozzle's height from the bed) until you achieve a perfect "squish"—the extruded lines should be slightly flattened, not perfectly round.61
Use a Heated Bed: A heated bed keeps the bottom layers of the print warm, reducing the overall thermal stress and improving adhesion. Use the recommended bed temperature for your material (e.g., 50-60°C for PLA, 90-110°C for ABS).30
Control the Environment: For high-shrinkage materials like ABS and ASA, use a printer enclosure to trap heat, maintain a stable ambient temperature, and prevent drafts from cooling the print too quickly.30
Use Adhesion Aids: Apply a thin layer of a bed adhesive like a glue stick, hairspray, or a specialized 3D printing adhesive to the build plate.30
Adjust Slicer Settings: In your slicing software, add a "brim" or a "raft." A brim adds a single-layer outline attached to your model's base, increasing surface area for better adhesion. A raft prints a disposable base underneath the entire part.30 Also, slow down the print speed and turn off the part cooling fan for the first few layers.30
Problem: Stringing and Oozing
Description: Unsightly, thin strands of plastic, like spider webs, are left behind as the print head travels between different points on the model.57
Primary Causes:
Incorrect Retraction Settings: Retraction is a mechanism where the extruder pulls the filament backward slightly before a travel move. If this setting is not optimized, pressure in the nozzle is not relieved, and plastic continues to ooze out.65
Nozzle Temperature Too High: The filament becomes too liquid and less viscous at higher temperatures, causing it to drip and ooze from the nozzle more easily.65
Wet Filament: As discussed previously, moisture in the filament turns to steam in the hot end, which can expand and force molten plastic out of the nozzle.49
Step-by-Step Solutions:
Enable and Tune Retraction: This is the most effective solution. In your slicer, ensure retraction is enabled. The two key settings are Retraction Distance (how far the filament is pulled back) and Retraction Speed (how fast it is pulled back). Print a retraction test model (widely available on sites like Printables and Thingiverse) and systematically adjust these values until stringing is minimized.65
Lower Nozzle Temperature: Reduce the printing temperature in 5°C increments. Find the lowest temperature at which your filament will still extrude reliably and produce strong layer bonds. A temperature tower test print is an excellent tool for this.65
Increase Travel Speed: Increase the "Travel Speed" setting in your slicer. This makes the nozzle move faster during non-printing moves, giving the filament less time to ooze.64
Dry Your Filament: If the above steps don't solve the problem, your filament is likely wet. Dry it using one of the methods described in the previous section.64
Problem: The Clogged Nozzle
Description: The printer's extruder stops pushing out filament, either partially (leading to thin, weak layers, a condition called under-extrusion) or completely. This is often accompanied by a clicking or grinding sound from the extruder motor as it struggles to push the jammed filament.57
Primary Causes:
Debris or Contamination: A small particle of dust or foreign material in the filament can get stuck in the tiny nozzle opening.68
Heat Creep: The filament softens too early, before it reaches the melt zone, causing it to buckle and create a jam. This is often due to inadequate cooling of the hot end.
Carbonized Material: When switching between filaments with different temperature requirements (e.g., from high-temp ABS to low-temp PLA), residue from the previous material can burn and carbonize inside the nozzle, creating a blockage.68
Step-by-Step Solutions:
Manual Push: Heat the nozzle to its printing temperature and try to manually push the filament through. This can sometimes clear a minor clog.73
Use a Nozzle Cleaning Needle: While the nozzle is hot, carefully insert a thin acupuncture needle (often included with 3D printers) up into the nozzle tip and move it around to dislodge the obstruction.73
Perform a "Cold Pull" (Atomic Method): This is a highly effective technique. Heat the nozzle, manually push a piece of Nylon or cleaning filament through to flush out the old material, then lower the temperature significantly (e.g., to 100°C for PLA). Once partially cooled, pull the filament out forcefully. The semi-solidified filament should pull the clog out with it, leaving a clean impression of the nozzle's interior on its tip.70
Chemical Cleaning: For very stubborn clogs, the nozzle can be removed from the printer and soaked in a solvent (e.g., acetone for ABS) to dissolve the blockage.72
Problem: Weak Prints and Poor Layer Adhesion
Description: The finished print feels fragile and can be easily pulled apart along the layer lines. This is known as delamination and indicates a weak bond between the layers.57
Primary Causes:
Printing Temperature Too Low: The filament is not being melted sufficiently to form a strong, molten bond with the layer below it.68
Printing Too Fast: The plastic doesn't have enough time to melt and fuse with the previous layer before the next one is deposited on top.58
Excessive Part Cooling: The part cooling fan is running too high, solidifying the plastic too quickly and preventing proper layer fusion. This is a common issue with materials like ABS and PETG.68
Step-by-Step Solutions:
Increase Nozzle Temperature: This is the most common fix. Increase the printing temperature in 5°C increments, staying within the material's recommended range, until layer adhesion improves.58
Reduce Print Speed: Slowing down the overall print speed gives the layers more time to bond effectively.77
Adjust Cooling Fan Speed: Reduce the speed of the part cooling fan. For materials like ABS, it should often be turned off entirely.68
Check for Under-Extrusion: Poor layer adhesion can also be a symptom of under-extrusion. Ensure your extruder is calibrated correctly and that the nozzle is not partially clogged.77
Conclusion: Your Path Forward in 3D Printing
This guide has navigated the foundational concepts of FDM 3D printing, from the basic mechanics of extrusion to the nuanced properties of various filaments and the practical skills of material management and troubleshooting. The key takeaways for any beginner are to recognize that material selection is a process of managing trade-offs, that filament itself requires care and attention, and that most printing problems can be solved with a systematic, knowledge-based approach.
Summary of Key Learnings
Start with PLA: It is the most forgiving and accessible material, allowing you to learn the fundamentals of your printer and slicing software with the fewest variables.
Understand the Trade-Offs: There is no single "best" filament. PLA is rigid but brittle and heat-sensitive. ABS is strong and heat-resistant but difficult to print. PETG offers a versatile balance but requires tuning to manage stringing. Your project's needs—not a generic sense of "strength"—should dictate your material choice.
Filament is Perishable: Most filaments are hygroscopic and will absorb moisture from the air, leading to a host of print quality issues. Proper storage in dry, airtight containers is not optional; it is a critical component of reliable printing.
Troubleshoot Systematically: When a print fails, resist the urge to change multiple settings at once. Address the most likely causes first: check bed adhesion and leveling for warping, tune retraction and temperature for stringing, and ensure your filament is dry for a wide range of issues.
A Recommended Filament Journey for the Beginner
Embarking on your 3D printing journey is an exciting prospect. By approaching material selection as a structured learning path, you can build your skills progressively and avoid unnecessary frustration.
Step 1: Master PLA. Begin your journey here. Print a wide variety of models—from simple calibration cubes to more complex decorative items. Use this time to become intimately familiar with your printer's operation and your slicer's core settings. Achieve consistent, high-quality PLA prints before moving on.15
Step 2: Graduate to PETG. Once you are confident with PLA, PETG is the logical next step. It will introduce you to printing with a required heated bed and teach you the fine art of tuning retraction settings to combat stringing. The reward is the ability to create strong, durable, and temperature-resistant functional parts.15
Step 3: Experiment with Flexibility (TPU). If your printer has a direct-drive extruder, printing with TPU is an excellent way to expand your capabilities. It will teach you the importance of slow, methodical printing and how to manage a challenging, non-rigid material.16
Step 4: Tackle the Engineering Challenge (ABS/ASA). Only after mastering the previous materials should you attempt to print with ABS or its weather-resistant cousin, ASA. By this point, you will have the skills to manage high temperatures and troubleshoot adhesion issues. Printing these materials successfully, ideally with an enclosure, marks a significant milestone in your development as a printer operator.16
The world of 3D printing filaments is constantly evolving, offering a growing palette of materials to bring any idea into the physical world. This journey of exploration is a core part of the creative and technical freedom that makes 3D printing such a revolutionary technology. Happy printing.
Works cited
Types of 3D Printer Filaments - Dassault Systèmes, accessed October 15, 2025, https://www.3ds.com/make/solutions/blog/types-3d-printer-filaments
What is Fused Deposition Modeling (FDM)? - Markforged, accessed October 15, 2025, https://markforged.com/resources/learn/3d-printing-basics/3d-printing-processes/what-is-fused-deposition-modeling-fdm
Fused filament fabrication - Wikipedia, accessed October 15, 2025, https://en.wikipedia.org/wiki/Fused_filament_fabrication
3D Printing Filament | FDM Durable Plastic Parts & Prototypes, accessed October 15, 2025, https://www.curbellplastics.com/materials/specialty-products/prototyping-tooling/3d-printing-filament/
Ultimate Materials Guide - 3D Printing with Carbon Fiber - Simplify 3D, accessed October 15, 2025, https://www.simplify3d.com/resources/materials-guide/carbon-fiber-filled/
The Ultimate Guide to 1.75mm and 2.85mm Filaments: Differences, Benefi - noclogger.com, accessed October 15, 2025, https://noclogger.com/blogs/news/the-ultimate-guide-to-1-75mm-and-2-85mm-filaments-differences-benefits-and-drawbacks
1.75 mm - Glossary | Prusa Knowledge Base, accessed October 15, 2025, https://help.prusa3d.com/glossary/1-75-mm_134813
Types of Filament for 3D Printing: The Ultimate Guide - Wevolver, accessed October 15, 2025, https://www.wevolver.com/article/3d-printer-filament-types-functional-filaments
3D Printer Filament: Filament Diameter and Spool Dimensions - Snapmaker, accessed October 15, 2025, https://www.snapmaker.com/blog/3d-printer-filament-diameter-and-spool-dimensions/
1.75mm vs 2.85mm Filament: Which Is Best For Your 3D Printer?, accessed October 15, 2025, https://www.amolen.com/blogs/blog/3d-printing-filament-diameter-guide
What size 3d print filament is most commonly bought - JLC3DP, accessed October 15, 2025, https://jlc3dp.com/blog/what-size-3d-print-filament-is-most-commonly-bought
A Beginner's Guide to Main Types of 3D Printing Filaments - anycubic-store, accessed October 15, 2025, https://store.anycubic.com/blogs/3d-printing-guides/different-types-of-3d-printer-filament
What is PLA Filament? Composition, Advantages, Applications - Wevolver, accessed October 15, 2025, https://www.wevolver.com/article/what-is-pla-filament-composition-advantages-applications
PLA Filament: A Comprehensive Guide to 3D Printing PLA Materials, accessed October 15, 2025, https://americanfilament.us/blogs/3d-printing-guide/pla-filament-a-comprehensive-guide-to-3d-printing-materials
Material Guide: Best Filament for Beginners – Easy Start 3D - FormFutura, accessed October 15, 2025, https://www.formfutura.com/blog/blogs-1/material-guide-the-best-filament-for-beginners-76
FDM 3D Printing Filament guide for Beginners - SOVOL, accessed October 15, 2025, https://www.sovol3d.com/blogs/news/fdm-3d-printing-filament-guide-for-beginners
3D Printer Filament Comparison Guide - MatterHackers, accessed October 15, 2025, https://www.matterhackers.com/3d-printer-filament-compare
Polylactic Acid (PLA) Filament Review - JuggerBot 3D, accessed October 15, 2025, https://juggerbot3d.com/pla-filament-review/
PETG vs PLA vs ABS: 3D Printing Strength Comparison - UltiMaker, accessed October 15, 2025, https://ultimaker.com/learn/petg-vs-pla-vs-abs-3d-printing-strength-comparison/
The 3D Printing Holy Trinity: PLA, ABS, and PETG - Slice Engineering, accessed October 15, 2025, https://www.sliceengineering.com/blogs/news/the-3d-printing-holy-trinity
PLA vs ABS vs PETG: The Main Differences - All3DP, accessed October 15, 2025, https://all3dp.com/2/pla-vs-abs-vs-petg-differences-compared/
What is PLA? (Everything You Need To Know) - TWI, accessed October 15, 2025, https://www.twi-global.com/technical-knowledge/faqs/what-is-pla
3D Printing Materials Guide - LulzBot, accessed October 15, 2025, https://lulzbot.com/content/3d-printing-materials-guide
Temperature Settings for Perfect Prints with PLA, ABS and PETG - Creality Cloud, accessed October 15, 2025, https://www.crealitycloud.com/blog/tutorials/temperature-settings-for-perfect-prints-with-pla-abs-petg
Best 3D Printing Temperatures for PLA, ABS, Nylon & More - Creality Community Forum, accessed October 15, 2025, https://forum.creality.com/t/best-3d-printing-temperatures-for-pla-abs-nylon-more/10092
Everything About ABS Filament | 3D Printing Guide - FormFutura, accessed October 15, 2025, https://www.formfutura.com/blog/blogs-1/everything-about-abs-filament-24
ABS filament for 3D printing: learning about plastic materials - Felfil, accessed October 15, 2025, https://felfil.com/abs-filament-for-3d-printing-learning-about-plastic-materials/
All About ABS 3D Printing Filament: Materials, Properties, Definition - Xometry, accessed October 15, 2025, https://www.xometry.com/resources/3d-printing/abs-3d-printing-filament/
ABS 3D Printer Filament | ABS Material Properties and Uses - Terrafilum, accessed October 15, 2025, https://www.terrafilum.com/products/abs/
Prevent Warping - You Can Do It - 3DJake, accessed October 15, 2025, https://www.3djake.com/info/guide/prevent-warping-you-can-do-it
TH3D Filaments – Recommended Nozzle and Bed Temperatures - TH3D Studio, accessed October 15, 2025, https://tickets.th3dstudio.com/products/article/th3d-filaments-%E2%80%93-recommended-nozzle-and-bed-temperatures
Polyethylene Terephthalate Glycol (PETG) Filament Review, accessed October 15, 2025, https://juggerbot3d.com/petg-filament-review/
Ultimate Materials Guide - Tips for 3D Printing with PETG - Simplify 3D, accessed October 15, 2025, https://www.simplify3d.com/resources/materials-guide/petg/
What Is PETG Filament Used For?, accessed October 15, 2025, https://3dtrcek.com/en/blog/post/what-is-petg-filament-used-for
Top Benefits of Using PETG Filament for Reliable 3D Prints - SOVOL, accessed October 15, 2025, https://www.sovol3d.com/blogs/news/petg-filament-benefits-for-reliable-3d-printing-results
Ultimate 3D printing guide for PETG filament - Numakers, accessed October 15, 2025, https://numakers.com/blogs/print-guide/ultimate-3d-printing-guide-for-petg-filament
Ultimate 3D Printing Material Properties Table - Simplify 3D, accessed October 15, 2025, https://www.simplify3d.com/resources/materials-guide/properties-table/
PLA vs. PETG vs. ABS – What's the Best All-Purpose Filament? : r/polymaker - Reddit, accessed October 15, 2025, https://www.reddit.com/r/polymaker/comments/1ise7ws/pla_vs_petg_vs_abs_whats_the_best_allpurpose/
Ultimate Materials Guide - 3D Printing Flexible Filament - Simplify 3D, accessed October 15, 2025, https://www.simplify3d.com/resources/materials-guide/flexible/
Printing Guide of TPU Filament with Creator 4 - FlashForge Fss, accessed October 15, 2025, https://en.fss.flashforge.com/10000/software/0e0a7e37c05b66c83c583f7196debd89.pdf
3D Printing with TPU: All You Need to Know | All3DP, accessed October 15, 2025, https://all3dp.com/2/3d-printing-tpu-all-you-need-to-know/
TPU Filament: What you Need to Know - Micro Center, accessed October 15, 2025, https://www.microcenter.com/site/mc-news/article/tpu-need-to-know.aspx
How to print with flexible filament - Original Prusa 3D Printers, accessed October 15, 2025, https://blog.prusa3d.com/how-to-print-with-flexible-filament_29672/
Printing issues related to filament affected by humidity, accessed October 15, 2025, https://support.bcn3d.com/knowledge/humid-filament-bcn3d
Filament Material Guide - Prusa Knowledge Base, accessed October 15, 2025, https://help.prusa3d.com/filament-material-guide
Ultimate Materials Guide - 3D Printing with Wood Filament - Simplify 3D, accessed October 15, 2025, https://www.simplify3d.com/resources/materials-guide/wood-filled/
Wood Filled Filament - 3D Printing Today, accessed October 15, 2025, https://3dprintingtoday.com/wood-filled-filament/
3D Printing Composite Materials - Magigoo Articles, accessed October 15, 2025, https://magigoo.com/blog/3d-printing-composite-materials/
Fix Wet 3D Printing Filament - Prevent Moisture Damage - FormFutura, accessed October 15, 2025, https://www.formfutura.com/blog/blogs-1/moisture-ruins-prints-heres-how-to-fix-it-84
Hygroscopy (3D Printing): What It Is & How to Deal With It - All3DP, accessed October 15, 2025, https://all3dp.com/2/hygrosopy-3d-printing-guide/
Wet Filament: Prevention, Symptoms & Drying - YouTube, accessed October 15, 2025, https://www.youtube.com/watch?v=_K0egIcjxvE
How to Store 3D Printer Filament: Tips for Perfect Prints - eufyMake, accessed October 15, 2025, https://www.eufymake.com/blogs/maintenance-guides/how-to-store-3d-printer-filament
Moisture and 3D Printing – Part 2 – Effects of Wet Filament - Drywise, accessed October 15, 2025, https://drywise.co/blogs/news/moisture-and-3d-printing-part-2-effects-of-wet-filament
3D Printer Filament Storage: How To Store PLA Filament? - Creality, accessed October 15, 2025, https://www.creality.com/blog/how-to-store-pla-filament
How do you store your Filament? : r/3Dprinting - Reddit, accessed October 15, 2025, https://www.reddit.com/r/3Dprinting/comments/1bb99es/how_do_you_store_your_filament/
Keep Filament Dry : 4 Steps (with Pictures) - Instructables, accessed October 15, 2025, https://www.instructables.com/Keep-Filament-Dry/
Print Quality Guide | Simplify3D Software, accessed October 15, 2025, https://www.simplify3d.com/resources/print-quality-troubleshooting/
27 Common FDM 3D Printing Problems and How to Fix Them, accessed October 15, 2025, https://www.3dxtech.com/blogs/trouble-shooting/27-common-fdm-3d-printing-problems-and-how-to-fix-them
3D Print Warping: Why It Causes and How to Prevent It - WayKen, accessed October 15, 2025, https://waykenrm.com/blogs/3d-printing-warping/
3D Print Warping (PLA, PETG, ABS): 6 Simple Fixes - Wevolver, accessed October 15, 2025, https://www.wevolver.com/article/3d-print-warping
3 Common 3D Printing Problems & How to Fix Them Fast - QIDI Tech, accessed October 15, 2025, https://qidi3d.com/fr/blogs/news/3d-printing-beginner-fixes
3D Printing Troubleshooting Guide: 30 Common Problems & Solutions - All3DP, accessed October 15, 2025, https://all3dp.com/1/common-3d-printing-problems-troubleshooting-3d-printer-issues/
How To Fix Warping And Adhesion Problems | Tips & Tricks #3dprinting - YouTube, accessed October 15, 2025, https://www.youtube.com/watch?v=U8vM6lAkcYU
3D Print Stringing: Common Causes and Quick Fixes - eufyMake, accessed October 15, 2025, https://www.eufymake.com/blogs/maintenance-guides/3d-print-stringing
3D Printer Stringing: 5 Simple Solutions | All3DP, accessed October 15, 2025, https://all3dp.com/2/3d-print-stringing-easy-ways-to-prevent-it/
Stringing or Oozing | Simplify3D Software, accessed October 15, 2025, https://www.simplify3d.com/resources/print-quality-troubleshooting/stringing-or-oozing/
How to Eliminate Stringing in 3D Printing: 5 Proven Solutions - SOVOL, accessed October 15, 2025, https://www.sovol3d.com/blogs/news/how-to-eliminate-stringing-in-3d-printing-5-proven-solutions
FDM 3D Printing: Common problems and how to solve them by +bitfab | Wikifactory, accessed October 15, 2025, https://wikifactory.com/+bitfab/stories/fdm-3d-printing-common-problems-and-how-to-solve-them
How to fix stringing - MakerBot Support, accessed October 15, 2025, https://support.makerbot.com/s/article/1667337578307
How to Solve 3D Printing Problems? Troubleshooting & Fixing FDM Issues - YouTube, accessed October 15, 2025, https://www.youtube.com/watch?v=TdnH5wNFgy4
FDM 3D Printing: Troubleshooting Mechanical and Temperature Issues - anycubic-store, accessed October 15, 2025, https://store.anycubic.com/blogs/3d-printing-guides/fdm-3d-printing-troubleshooting-mechanical-and-temperature-issues
How to Unclog 3D Printer Nozzles | Easy Fix Guide - FormFutura, accessed October 15, 2025, https://www.formfutura.com/blog/blogs-1/how-to-unclog-3d-printer-nozzles-18
Step-by-Step Guide: Unclogging Your 3D Printer Nozzle | Obico, accessed October 15, 2025, https://www.obico.io/blog/step-by-step-guide-unclogging-your-3d-printer-nozzle/
Nozzle/Hotend Unclogging Procedure for X1/P1 - Bambu Lab Wiki, accessed October 15, 2025, https://wiki.bambulab.com/en/x1/troubleshooting/nozzle-clog
www.wevolver.com, accessed October 15, 2025, https://www.wevolver.com/article/how-to-clean-3d-printer-nozzle#:~:text=A%20common%20method%20for%20cleaning,solvent%20for%20a%20few%20hours.
Common 3D Printing Problems and Solutions for Beginners - Aceaddity, accessed October 15, 2025, https://www.aceaddity.com/blogs/blog-1/common-3d-printing-problems-and-solutions-for-beginners-a-comprehensive-guide
3D Printing: Tips for Beginners - ROSA3D Filaments, accessed October 15, 2025, https://www.rosa3d.pl/en/3d-printing-tips-for-beginners
The 12 most common problems in 3D printing and how to fix them - REALvision Online, accessed October 15, 2025, https://realvisiononline.com/blog/the-12-most-common-problems-in-3d-printing-and-how-to-fix-them
An Expert's Guide to 3D Printing Technologies for the Modern Maker
From Digital to Physical: The Additive Revolution
3D printing is a form of additive manufacturing, a process that builds three-dimensional objects by depositing successive layers of material based on a digital model.1 This layer-by-layer construction is the fundamental principle that unites all 3D printing technologies, from simple desktop machines to complex industrial systems.2 This approach stands in stark contrast to the manufacturing methods that have dominated for centuries.
Subtractive Manufacturing, such as CNC machining, begins with a solid block of material and carves away unwanted portions through cutting, drilling, or milling to reveal the final object. While precise, this method can be incredibly wasteful, with some processes resulting in up to 90% of the original material being discarded as scrap.2 It is best suited for producing parts with simple geometries from hard materials in medium volumes.3
Formative Manufacturing, like injection molding, uses a pre-made mold or die to shape a liquid or pliable material. This method is unparalleled for the high-volume production of identical parts at a low cost per unit. However, the creation of the initial mold represents a significant upfront investment in both time and money, making it prohibitive for small production runs or custom designs.3
Additive manufacturing circumvents these limitations. By building objects from the ground up, it drastically reduces material waste and eliminates the need for expensive, part-specific tooling.2 This makes it the ideal solution for low-volume production runs, the creation of highly complex designs, and rapid prototyping where speed is a critical factor.2 The result is a tool-less process that empowers creators with unprecedented design freedom and the ability to produce customized objects on demand.2 This shift does more than just introduce a new way to make things; it fundamentally changes who can make things. By consolidating the capabilities of a factory into a single, relatively affordable desktop machine, additive manufacturing has democratized the means of production, moving it from centralized industrial plants to decentralized workshops, offices, and homes.5
The Universal Workflow: From Idea to Object
Regardless of the specific technology, the journey from a concept to a physical object follows a consistent digital workflow. For a newcomer, mastering this digital process is often a more significant learning curve than operating the machine itself, as the choices made here directly dictate the success and quality of the final print.
The Digital Blueprint (CAD): Every 3D print begins as a three-dimensional digital model. This model is created using Computer-Aided Design (CAD) software.6 A wide array of software is available, catering to different skill levels. Beginners often start with simple, intuitive programs like Tinkercad, while more advanced users may opt for powerful tools like Fusion 360 (which is free for non-commercial use) or Blender for creating more organic, sculptural models.8
The Universal Language (STL): Once the design is complete, the CAD model is exported into a standard file format that 3D printers can understand. The most common format is STL (an abbreviation for stereolithography), which describes the surface geometry of the model as a mesh of triangles.1 Other formats like OBJ and 3MF are also used.1
Slicing the Model: The STL file is then imported into a specialized program called a "slicer." This software, such as Ultimaker Cura, PrusaSlicer, or Chitubox, digitally "slices" the 3D model into hundreds or thousands of thin horizontal layers.6 Within the slicer, the user defines critical print parameters like layer height, infill density, and the placement of support structures.9
The Machine's Instructions (G-Code): The final output from the slicer is a file containing G-code. G-code is a numerical control programming language that provides the printer with precise, step-by-step instructions for creating the object.8 It dictates every action: the movement of the print head along the X (left-right), Y (front-back), and Z (up-down) axes; the speed of these movements; the temperature of the nozzle and build platform; and the rate at which material should be deposited.8
Essential Terminology for the Beginner
Understanding the following terms, which are commonly found in slicer software, is crucial for controlling the quality, strength, and print time of a 3D printed object.
Build Volume/Area: This refers to the maximum physical dimensions (Height x Width x Depth) of an object that can be printed on a particular machine.5
Layer Height: This is the thickness of each individual layer, typically measured in millimeters (mm) or microns (). A smaller layer height (e.g., 0.1 mm) produces a smoother, more detailed surface finish but significantly increases the total print time. A larger layer height (e.g., 0.3 mm) prints much faster but results in more visible layer lines.3
Infill Density: This parameter determines the internal structure of the print and is expressed as a percentage. A print with 0% infill is completely hollow, while 100% infill is a solid object. For most standard prints, an infill density of 15-50% provides a good balance of strength, material consumption, and print speed.8
Support Structures: When a design has significant overhangs (parts that extend out into open space) or bridges, the printer must build temporary vertical supports to hold up the molten material as it is deposited. These structures are designed to be removed during the post-processing stage.3
Print Bed / Build Platform: This is the surface onto which the 3D model is printed. Most modern printers feature a heated bed, which helps the first layer of the print adhere properly and prevents a common issue known as "warping," where the corners of the print lift and curl during cooling.9
A Taxonomy of 3D Printing: The Seven Core Processes
While the consumer market is dominated by a few key technologies, the broader field of additive manufacturing is vast and diverse. To bring order to this landscape, the International Organization for Standardization (ISO) and ASTM International have established a standard (ISO/ASTM 52900) that classifies 3D printing into seven distinct process categories.10 Understanding these categories provides a valuable map of the entire industry, highlighting the divide between accessible desktop technologies and their powerful industrial counterparts.
The Official Classification (ISO/ASTM 52900)
Material Extrusion: This process involves selectively dispensing a material, typically a molten thermoplastic filament, through a nozzle. The most common example is Fused Deposition Modeling (FDM), which functions much like a precise, computer-controlled hot glue gun.10
Vat Photopolymerization: This category uses a vat of liquid photopolymer resin that is selectively cured (hardened) by a targeted light source. The two primary methods are Stereolithography (SLA), which uses a laser, and Digital Light Processing (DLP), which uses a projector.11
Powder Bed Fusion (PBF): In this process, a thermal energy source, such as a laser or an electron beam, is used to selectively fuse regions of a powder bed. This category includes Selective Laser Sintering (SLS) for polymers and Selective Laser Melting (SLM) for metals.11
Material Jetting: This process works similarly to a 2D inkjet printer, but instead of ink, it deposits droplets of a build material (like a photopolymer resin) which are then cured with ultraviolet (UV) light. A key advantage is its ability to deposit multiple materials simultaneously, enabling the creation of multi-color and multi-material parts.11
Binder Jetting: This method uses a print head to selectively deposit a liquid binding agent (a "glue") onto a thin layer of powder material (such as sand, metal, or ceramic). The process is repeated layer by layer, and the final "green" part is often post-processed (e.g., sintered in an oven) to achieve its final strength.11
Directed Energy Deposition (DED): DED systems melt material as it is being deposited. A focused thermal energy source (like a laser or electron beam) creates a melt pool on a substrate, and material (in wire or powder form) is fed into it. This process is often used to repair or add material to existing large metal components.10
Sheet Lamination: This process builds objects by bonding together thin sheets of material. Layers of paper, plastic, or metal foil are successively glued or welded on top of one another, with a laser or knife cutting the outline of each layer.10
For those new to 3D printing, the landscape is effectively divided. The technologies that have been successfully adapted for desktop use—primarily Material Extrusion (FDM) and Vat Photopolymerization (SLA), with Powder Bed Fusion (SLS) now emerging—are defined by their relative affordability, safety, and manageable material handling. The other four categories remain almost exclusively in the industrial domain, representing powerful capabilities that are typically accessed through professional manufacturing services.1
The Hobbyist's Workhorse: Fused Deposition Modeling (FDM)
Fused Deposition Modeling (FDM), also known as Fused Filament Fabrication (FFF), is the most widely used and recognizable type of 3D printing, especially at the consumer level.1 Its popularity stems from its straightforward mechanics, low cost of entry, and a vast ecosystem of materials, making it the quintessential starting point for beginners.
How It Works: The "Hot Glue Gun" Analogy
The FDM process is intuitive and can be accurately compared to a robotic hot glue gun.6 A spool of solid thermoplastic filament is fed by an extruder mechanism into a heated nozzle, known as the "hot end".9 The nozzle heats the filament to its melting point and deposits it as a thin, continuous stream onto the build platform, meticulously tracing the two-dimensional shape of the object's first layer.9 Once the layer is complete, the build platform moves down (or the gantry holding the extruder moves up) by a precise distance—the layer height—and the process repeats. Layer by layer, the molten plastic cools and fuses to the layer below it, gradually building the three-dimensional object.10 The entire operation is orchestrated by the G-code, which directs the precise movements of the print head and platform along the X, Y, and Z axes.6
The FDM Material Trinity: An In-Depth Comparison of PLA vs. ABS vs. PETG
While FDM technology supports a wide array of exotic filaments, three materials form the core of hobbyist and prosumer printing: PLA, ABS, and PETG.8 The choice between them is a critical decision driven by the intended application of the final part.
PLA (Polylactic Acid): The Beginner's Best Friend. PLA is celebrated for its exceptional ease of use. It prints at relatively low temperatures, exhibits minimal warping, and does not require a heated bed, making it highly forgiving of suboptimal print settings.13 This "forgiveness factor" is its most valuable feature for newcomers, as it dramatically increases the likelihood of a successful first print, providing crucial positive reinforcement. While it boasts good tensile strength, PLA is quite brittle and has a low heat resistance, with a glass transition temperature around 55-60°C, causing it to deform in warm environments like a car on a summer day.13 It is best suited for visual models, concept prototypes, and low-stress functional parts intended for indoor use.16
ABS (Acrylonitrile Butadiene Styrene): The Durable Industrial Staple. ABS is prized for its toughness, high impact resistance, and superior heat tolerance, withstanding temperatures up to around 105°C.15 These properties make it a staple in industrial applications for creating durable, functional parts.17 However, it is notoriously difficult to print. ABS is highly prone to warping as it cools and requires a heated bed set to a high temperature (90-110°C) and a fully enclosed printer to maintain a stable ambient temperature.14 During printing, it releases potentially harmful fumes with a strong odor, necessitating excellent ventilation.14 A unique feature of ABS is its ability to be "vapor smoothed" with acetone, which melts the outer surface to eliminate layer lines and create a glossy, injection-molded finish.13
PETG (Polyethylene Terephthalate Glycol): The Best of Both Worlds. PETG has emerged as a popular all-rounder, offering a compelling compromise between PLA and ABS. It is significantly stronger and more durable than PLA, with better impact resistance and a higher heat tolerance of around 85°C.13 It is also much easier to print than ABS, with significantly less warping.17 Furthermore, PETG is known for its chemical and UV resistance, making it a better choice for parts used outdoors.13 Its main printing challenge is a tendency for "stringing," where fine threads of plastic are left between separate parts of a model, though this can be mitigated by fine-tuning print settings.13
Advantages and Limitations of FDM
Advantages:
Affordability: FDM is by far the most accessible 3D printing technology. Entry-level printers are widely available for a few hundred dollars, and filament materials are inexpensive.5
Ease of Use: The technology's simple mechanics make it easy to learn and operate, lowering the barrier to entry for hobbyists and educators.18
Material Variety: The FDM ecosystem boasts an enormous selection of materials beyond the basic three, including flexible filaments (TPU), composites reinforced with carbon fiber or wood, and high-performance engineering thermoplastics.5
Limitations:
Lower Resolution: FDM printers struggle to reproduce very fine details and leave visible layer lines on the surface of parts, particularly on curved or angled geometries. This makes them less suitable for highly detailed miniatures or aesthetic models.3
Anisotropic Properties: Because parts are built in layers, they are inherently weaker along the Z-axis (the vertical build direction) than they are along the X and Y axes. This mechanical weakness between layers, known as anisotropy, is a critical design consideration for any functional part that will be under stress.3
Surface Finish: The characteristic stepped appearance of FDM prints often necessitates post-processing, such as sanding and painting, to achieve a smooth, professional-looking surface.7
The accessibility of FDM makes it a powerful gateway into the world of additive manufacturing. It provides a low-risk platform for learning the fundamental principles of 3D design and printing. However, it is often the direct experience with FDM's limitations—the desire for finer detail or stronger parts—that motivates users to explore more advanced technologies like SLA and SLS.
The Beginner's FDM Workflow & Post-Processing
Pre-Print: The workflow begins by loading a spool of filament onto the printer and feeding the end into the extruder. The most critical pre-print step is bed leveling—ensuring the nozzle maintains a perfect, consistent distance from the build platform across its entire surface. Many modern printers feature auto-bed leveling systems that simplify this process.9
During Print: It is crucial to monitor the first few layers of the print. A successful first layer that adheres well to the bed is the foundation for a successful print.
Post-Processing:
Part Removal: Once the print is complete and the bed has cooled, the object is carefully removed, sometimes with the help of a thin scraper.22
Support Removal: Any support structures generated by the slicer must be broken away from the main model. This can be done by hand or with pliers and often leaves small blemishes on the surface where the supports were attached.9
Finishing: To improve the aesthetic quality, FDM prints are commonly sanded to remove layer lines. This can be followed by priming and painting. For ABS prints, vapor smoothing offers a way to achieve a glossy, injection-molded quality finish without manual sanding.9
The Pursuit of Precision: Stereolithography (SLA)
Stereolithography (SLA) represents the next step up from FDM in terms of quality and precision. As a form of vat photopolymerization, it was the world's first 3D printing technology and remains a popular choice for professionals who require high-accuracy parts with a smooth surface finish.4
How It Works: Drawing with Light
The SLA process begins with a tank, or "vat," filled with a liquid photopolymer—a type of resin that solidifies when exposed to UV light.11 A build platform is lowered into the vat, leaving a thin layer of resin between the platform and the bottom of the tank. A precisely controlled UV light source then selectively cures this layer of resin, tracing the cross-section of the 3D model and hardening it into a solid layer.4 The platform then moves up by one layer height, allowing a fresh layer of liquid resin to flow underneath, and the process repeats until the object is fully formed.23
There are two main techniques within this category:
Stereolithography (SLA): This traditional method uses a single-point UV laser guided by mirrors to draw each layer. This approach is capable of extremely high accuracy and resolution.11
Digital Light Processing (DLP): This method uses a digital light projector, similar to one used for presentations, to flash an image of an entire layer at once. This makes DLP printers significantly faster than SLA printers, though their resolution is limited by the pixel size of the projector screen.11
The World of Resins: A Material for Every Need
The primary strength of SLA technology lies not just in its precision but in the vast and expanding library of specialized resins. While FDM offers variety in general-purpose materials, SLA provides highly specialized formulations engineered for specific applications that are often impossible to achieve with filament-based printing.4 This specialization is what elevates SLA from a prototyping tool to a professional manufacturing solution.
Advantages and Limitations of SLA
Advantages:
High Resolution and Fine Details: SLA is capable of producing parts with exceptional detail and accuracy, capturing intricate features that are impossible with FDM.4
Smooth Surface Finish: Parts emerge from the printer with a very smooth surface, often comparable to that of injection-molded plastics. This minimizes the need for post-processing to achieve an aesthetic finish.4
Material Properties: The wide range of engineering resins allows for the creation of parts that are isotropic (equally strong in all directions) and watertight, suitable for many functional applications.4
Limitations:
Higher Cost: SLA printers and their proprietary resins are generally more expensive than their FDM counterparts. The ongoing operational costs are also higher due to the need for solvents and other consumables.7
Involved Post-Processing: The workflow does not end when the print is finished. Parts must undergo a mandatory, multi-step post-processing procedure that is messy and time-consuming.18
Safety and Handling: Liquid resins are toxic and can cause skin irritation or allergic reactions before they are fully cured. They must be handled with personal protective equipment (PPE), including nitrile gloves and safety glasses, in a well-ventilated space.18
The true cost of adopting SLA extends beyond the initial purchase price. It includes the ongoing investment in consumables like solvents, the space required for a dedicated washing and curing station, and the labor time for the mandatory post-processing workflow. This reframes SLA not as a simple upgrade from FDM, but as a more demanding professional toolset.
The Beginner's SLA Workflow & Post-Processing
Pre-Print: The process begins with filling the printer's resin tank and ensuring the build platform is clean and properly calibrated.
During Print: The printing process is fully automated and typically runs without intervention.
Post-Processing (Mandatory Steps):
Washing: After the print completes, the part is removed from the build platform while still covered in sticky, uncured resin. It must then be submerged and agitated in a solvent bath—typically isopropyl alcohol (IPA)—to wash away all residual liquid. This can be done manually in containers or with an automated wash station.18
Curing: Once the part is washed and completely dry, it is placed in a UV curing chamber. This exposure to UV light fully hardens the resin and brings the part to its final mechanical properties. While optional for some standard resins, post-curing is required for all engineering-grade materials to achieve their specified strength and stability.18
Support Removal: The support structures, which are made from the same solid resin, are then carefully removed from the part using flush cutters. Any remaining marks can be sanded away for a perfectly smooth finish.23
The Bridge to Production: Selective Laser Sintering (SLS)
Selective Laser Sintering (SLS) is a powder bed fusion technology that has long been a staple of industrial additive manufacturing. Recently, the emergence of more compact and affordable "benchtop" systems has made this powerful technology accessible to a new class of small businesses and engineering professionals, effectively bridging the gap between desktop prototyping and small-scale production.4
How It Works: Fusing Powder with a Laser
The SLS process takes place inside a chamber containing a build platform and a bin of polymer powder, most commonly nylon.4 The chamber is heated to a temperature just below the powder's melting point. A recoating blade or roller sweeps across the build platform, depositing a very thin, smooth layer of powder.30 A high-power laser, guided by a set of mirrors, then selectively scans the 2D cross-section of the part, sintering—or fusing—the powder particles together into a solid layer.4 The build platform then lowers by one layer height, a new layer of powder is applied, and the laser sinters the next cross-section, fusing it to the layer below. This cycle repeats until the object is complete. A key feature of this process is that the unsintered powder surrounding the object acts as a natural support structure during the print.4
The Power of Powder: Nylon and Beyond
The most common material for SLS is nylon, a versatile engineering thermoplastic known for its excellent mechanical properties.4 Parts printed in nylon are lightweight yet strong, flexible, and highly resistant to impact, chemicals, heat, and UV light, making them suitable for demanding, end-use applications.4 Common variants include PA12 and PA11. The SLS material portfolio is also expanding to include flexible materials like TPU and composite powders reinforced with additives like carbon fiber or glass fibers for enhanced stiffness and strength.18
Advantages and Limitations of SLS
Advantages:
Unmatched Design Freedom: The defining advantage of SLS is that it requires no dedicated support structures.4 The surrounding powder supports all features, enabling the creation of extremely complex geometries, intricate internal channels, and even pre-assembled moving parts that would be impossible to produce with FDM or SLA.3
Strong Functional Parts: SLS produces parts with robust, predictable mechanical properties that are comparable to those made with traditional manufacturing methods like injection molding. This makes the technology ideal for functional prototyping and the production of durable end-use parts.3
High Productivity and Scalability: Because no supports are needed, parts can be tightly "nested" in three dimensions to fill the entire build volume. This allows for the production of dozens or even hundreds of parts in a single print job, making SLS highly efficient and cost-effective for batch manufacturing.20
Limitations:
High Cost of Entry: While becoming more accessible, SLS remains the most expensive of the three main plastic printing technologies. A complete "desktop" SLS ecosystem, including the printer and necessary post-processing equipment, represents a significant capital investment, typically starting in the tens of thousands of dollars.7
Extensive Workflow and Space Requirements: The SLS process requires a multi-stage workflow and dedicated equipment beyond the printer itself. A powder handling and recovery station is needed to excavate parts and recycle unused powder, and a media blaster is often used for cleaning. This requires a considerable amount of space and a controlled workshop environment.27
Longer Turnaround Time: The overall process includes a lengthy cool-down period after the print job is finished, which can take several hours, before the parts can be safely removed from the powder cake.20
Surface Finish: Parts produced with SLS have a characteristic grainy or slightly rough surface finish due to the nature of the sintered powder particles. While functional, achieving a smooth finish requires additional post-processing steps like media blasting or polishing.3
The adoption of SLS signifies a strategic shift from simply "making things" to "manufacturing things." Its entire workflow and economic model are optimized for producing parts in volume, making it a powerful tool for entrepreneurs and businesses looking to bring in-house production capabilities previously only available through large industrial facilities.
The Beginner's SLS Workflow & Post-Processing
Pre-Print: In the slicer software, parts are digitally arranged and nested within the build volume to maximize packing density and production efficiency.
During Print: The printing process is fully automated.
Post-Processing:
Cooling: After the print job completes, the entire build chamber must cool down slowly and uniformly to ensure part accuracy and prevent warping. This can take up to 50% of the total print time.20
Excavation: The build chamber is moved to a dedicated cleaning and powder recovery station (such as the Formlabs Fuse Sift). The operator carefully excavates the finished parts from the surrounding block of unsintered powder.27
Cleaning: Excess powder is removed from the surface of the parts using brushes, compressed air, or, for a more professional finish, an automated media blaster that bombards the parts with fine beads.32
Powder Recycling: A major part of the SLS workflow is recovering the unsintered powder from the breakout process. This powder is sifted to remove any contaminants and then mixed with a specified ratio of fresh powder to be used in subsequent print jobs. This high recyclability rate (often 50% or more) significantly reduces material waste and lowers the effective cost per part.18
Making Your Choice: A Practical Framework for Beginners
Navigating the world of 3D printing technologies can be daunting, but the decision ultimately hinges on a clear understanding of your primary goals, budget, and workspace limitations. There is no single "best" technology; instead, each presents a unique set of trade-offs between cost, performance, and ease of use. The optimal choice is the one that aligns with the compromises you are most willing to make.
Cost of Entry and Operation: A Financial Breakdown
The financial commitment for 3D printing varies dramatically across technologies, encompassing not only the initial hardware purchase but also ongoing material and operational costs.
Initial Investment (Hardware):
FDM: The most affordable entry point, with budget printers starting around $200 and professional desktop models ranging from $2,000 to $8,000.7
SLA: Low-cost resin printers are available for under $1,000, while professional desktop systems typically fall in the $2,500 to $10,000 range.7
SLS: Represents the highest initial investment. Benchtop industrial systems start at just under $30,000 for the printer alone, with a complete ecosystem (including powder management stations) beginning around $60,000.7
Material Costs:
FDM: Standard filaments like PLA and PETG are the most economical, typically costing $20-$50 per kilogram.31
SLA: Liquid resins are more expensive, with standard and engineering resins costing $100-$200 per liter.7
SLS: Nylon powder costs around $100 per kilogram. However, the ability to recycle unused powder significantly lowers the effective material cost over time.7
Operational & Consumable Costs:
FDM: Minimal additional costs, primarily involving occasional replacement of nozzles and build plates.20
SLA: Incurs significant ongoing costs for washing solvents (IPA), disposable nitrile gloves, and periodic replacement of resin tanks.20
SLS: Has the highest energy consumption and requires specialized powder handling and cleaning equipment.20
Matching Technology to Your Project: A Decision Tree
If your primary concerns are BUDGET and EASE OF LEARNING...
Choose FDM. It is the most affordable, forgiving, and straightforward way to begin your 3D printing journey. It is perfect for hobbyists, educators, and anyone needing quick, low-cost prototypes where fine detail is not the top priority.20
If your primary concerns are AESTHETICS, FINE DETAIL, and a SMOOTH SURFACE...
Choose SLA. It is the undisputed leader for producing visually stunning models that look like finished products right off the printer. It is ideal for miniatures, jewelry, dental applications, and any prototype where surface quality is paramount.4
If your primary concerns are MECHANICAL STRENGTH and GEOMETRIC COMPLEXITY...
Choose SLS. It is the best choice for manufacturing strong, durable, functional parts. Its support-free nature unlocks the ability to create complex internal features and interlocking parts that are simply not possible with the other technologies.4
Essential Safety Protocols: A Technology-Specific Guide
A user's choice of technology may ultimately be determined by the practical limitations of their workspace. The safety requirements escalate significantly from FDM to SLS and are a critical, non-negotiable aspect of operating this equipment.
Universal Precautions: All 3D printers should be operated in a well-ventilated area, with a recommended minimum of 4-6 air exchanges per hour.34 Always review the manufacturer's instructions and the Safety Data Sheet (SDS) for any material being used.22
FDM Safety:
Hazards: The primary risks are burns from hot surfaces (nozzle and print bed) and the inhalation of emissions.34 Melting thermoplastics releases Volatile Organic Compounds (VOCs) and Ultrafine Particles (UFPs), with ABS being a notable offender.14
Precautions: Ensure good room ventilation. For materials like ABS, a printer enclosure with an activated carbon or HEPA filter is strongly recommended to contain emissions.34
SLA Safety:
Hazards: Liquid photopolymer resins and their fumes are toxic and are skin/respiratory irritants before being fully cured.18 The solvents used for washing, like IPA, are highly flammable.37 The high-intensity UV light sources can cause eye damage.37
Precautions: Always wear nitrile gloves and splash-proof safety glasses when handling liquid resin or solvent-washed parts.22 The workspace must be exceptionally well-ventilated. Uncured resin and contaminated materials (gloves, paper towels, solvent) must be cured under UV light before being disposed of as hazardous waste according to local regulations.34
SLS Safety:
Hazards: Fine polymer powders present a significant inhalation hazard and can be a combustible dust explosion risk under certain conditions.36 The high-power lasers used are a severe hazard to eyes and skin.38
Precautions: A full set of PPE is required when handling powder, including a respirator (N95 or better), gloves, and safety glasses.22 The workspace must have specialized equipment, such as grounded, dust-rated vacuums, to prevent static discharge and mitigate explosion risk. This technology is not suitable for a home or office environment and requires a dedicated, controlled workshop.36
Conclusion: Your Journey into Additive Manufacturing
The world of 3D printing offers a transformative set of tools for creators, engineers, and innovators. The journey begins with understanding the fundamental differences between the core technologies available to the modern maker.
Recapping the Core Technologies
Fused Deposition Modeling (FDM) stands as the accessible, affordable workhorse. It is the ideal starting point for learning the principles of additive manufacturing and is perfectly suited for general-purpose prototyping and hobbyist creations.
Stereolithography (SLA) is the artist's and designer's tool of choice. It delivers unmatched surface finish and fine detail, making it essential for applications where aesthetics and precision are the highest priorities.
Selective Laser Sintering (SLS) serves as the engineer's bridge to production. It excels at creating strong, complex, and functional parts with a workflow optimized for manufacturing in batches, not just single units.
A Look to the Future
The additive manufacturing landscape is in a constant state of evolution. A clear and powerful trend is the increasing accessibility of once-exclusive industrial technologies. The recent emergence of viable desktop SLS systems is a primary example of this democratization, empowering small businesses and individuals with manufacturing capabilities that were unimaginable just a decade ago.29 As this trend continues, the line between prosumer and professional will continue to blur, opening up new possibilities for localized, on-demand production.
Taking the First Step
Embarking on a journey with 3D printing is an investment in a new way of thinking and creating. Armed with a foundational knowledge of the processes, materials, and critical trade-offs, you are now equipped to make an informed decision and select the technology that best aligns with your vision. Whether you are a hobbyist bringing a digital sculpture to life, an entrepreneur prototyping a new product, or an engineer fabricating a functional part, the power to turn ideas into tangible reality is more accessible than ever before. The community of modern makers is vast and growing, and the first step is simply to begin.
Works cited
Unlocking the World of 3D Printing: A Comprehensive Beginner's Guide to 3D Printer Models, Printing Services, and Software | 3DPrinterOS, accessed October 15, 2025, https://www.3dprinteros.com/articles/unlocking-the-world-of-3d-printing-a-comprehensive-beginners-guide-to-3d-printer-models-printing-services-and-software
The Free Beginner's Guide - 3D Printing Industry, accessed October 15, 2025, https://3dprintingindustry.com/3d-printing-basics-free-beginners-guide
3D printing: What is it & how does it work? | Protolabs Network, accessed October 15, 2025, https://www.hubs.com/guides/3d-printing/
3D Printing Guide: Types of 3D Printers, Materials, and Applications ..., accessed October 15, 2025, https://formlabs.com/3d-printers/
The Best 3D Printers We've Tested for 2025 | PCMag, accessed October 15, 2025, https://www.pcmag.com/picks/the-best-3d-printers
How To 3D Print - Beginner's Guide To 3D Printing - 3D Insider, accessed October 15, 2025, https://3dinsider.com/3d-printing-guide/
Fastest 3D Printers: Compare FDM, SLA, and SLS 3D Printing ..., accessed October 15, 2025, https://formlabs.com/blog/fastest-3d-printer/
3D Printing for Beginners: Basics, Tips & Budget Guide - eufyMake, accessed October 15, 2025, https://www.eufymake.com/blogs/printing-guides/beginners-guide-to-3d-printing
3D Printing for Beginners: How to Get Started with FDM | All3DP, accessed October 15, 2025, https://all3dp.com/2/3d-printing-for-beginners-all-you-need-to-know-to-get-started/
3D printing - Wikipedia, accessed October 15, 2025, https://en.wikipedia.org/wiki/3D_printing
What are the most popular 3D printing technologies? - Engineering ..., accessed October 15, 2025, https://www.engineering.com/what-are-the-most-popular-3d-printing-technologies/
What are the types of 3D printers and what can they do? | Protolabs ..., accessed October 15, 2025, https://www.hubs.com/knowledge-base/types-of-3d-printing/
The 3D Printing Holy Trinity: PLA vs. PETG vs ... - Slice Engineering, accessed October 15, 2025, https://www.sliceengineering.com/blogs/news/the-3d-printing-holy-trinity
PLA vs ABS vs PETG: A Comparison of 3D Printing Filaments - Wevolver, accessed October 15, 2025, https://www.wevolver.com/article/comparison-of-pla-abs-and-petg-filaments-for-3d-printing
PETG vs PLA vs ABS: 3D Printing Strength Comparison - UltiMaker, accessed October 15, 2025, https://ultimaker.com/learn/petg-vs-pla-vs-abs-3d-printing-strength-comparison/
PLA vs ABS vs PETG: The Main Differences | All3DP, accessed October 15, 2025, https://all3dp.com/2/pla-vs-abs-vs-petg-differences-compared/
PLA vs. ABS vs. PETG: A Comprehensive Comparison - Unionfab, accessed October 15, 2025, https://www.unionfab.com/blog/2024/05/pla-vs-abs-vs-petg
SLA vs SLS vs FDM: comprehensive 3D printing comparison - Sinterit – Professional SLS 3D Printers & Accessories, accessed October 15, 2025, https://sinterit.com/blog/sls-technology/fdm-vs-sla-vs-sls-comparison/
PETG, PLA, and ABS A Guide to 3D Filament Types - Creality Cloud, accessed October 15, 2025, https://www.crealitycloud.com/blog/reviews/3d-filament-types-petg-vs-pla-vs-abs-comparison-guide
FDM vs SLA vs SLS: The Ultimate 3D Printing Comparison - Jaycon | Product Design, PCB & Injection Molding, accessed October 15, 2025, https://www.jaycon.com/fdm-vs-sla-vs-sls-the-ultimate-3d-printing-comparison/
FDM vs. SLA vs. SLS: Comparison Right 3D Printing 2025 - 3d paradise, accessed October 15, 2025, https://paradise-3d.com/fdm-vs-sla-vs-sls-3d-printing-comparison/
3D Printing Safety: Potential Hazards, Protection and Practices – Raise3D, accessed October 15, 2025, https://www.raise3d.com/blog/3d-printing-safety/
SLS vs SLA vs FDM: Key Differences in 3D Printing - Invent 3D, accessed October 15, 2025, https://invent3d.design/sls-sla-fdm-differences-3d-printing/
8 Main Types of Resin for 3D Printing (With Pro Tips and Use Cases), accessed October 15, 2025, https://siraya.tech/blogs/news/types-of-resin-for-3d-printing
What's the right resin for SLA? 3D printing materials compared ..., accessed October 15, 2025, https://www.hubs.com/knowledge-base/sla-3d-printing-materials-compared/
Guide to Stereolithography (SLA) 3D Printing | Formlabs, accessed October 15, 2025, https://formlabs.com/blog/ultimate-guide-to-stereolithography-sla-3d-printing/
Guide to 3D Printing 2: FDM, SLA & SLS | MistyWest, accessed October 15, 2025, https://www.mistywest.com/posts/guide-to-3d-printing-2/
Guide to Post-Processing and Finishing SLA Resin 3D Prints - Formlabs, accessed October 15, 2025, https://formlabs.com/blog/post-processing-and-finishing-sla-prints/
Is It Finally Time to Upgrade to an SLS 3D Printer? Here's What You ..., accessed October 15, 2025, https://all3dp.com/1/best-sls-3d-printer-desktop-industrial/
FDM vs. SLA vs. SLS vs. DLS: Battle of the 3D technologies - Sculpteo, accessed October 15, 2025, https://www.sculpteo.com/en/3d-learning-hub/3d-printing-technologies-and-processes/compare-fdm-sla-sls-dls/
Cost Comparison Of 3D Printing Methods: SLS And More, accessed October 15, 2025, https://www.zongheng3d.com/cost-comparison-of-3d-printing-methods-sls-vs-others/
Fuse 1+ 30W: Compact Selective Laser Sintering (SLS) 3D Printer ..., accessed October 15, 2025, https://formlabs.com/3d-printers/fuse-1/
FDM vs. SLA vs. SLS: Which 3D Printer Is Easiest to Use? - YouTube, accessed October 15, 2025, https://www.youtube.com/watch?v=4wHonWbx3fo
3D Printer Safety - Clemson University, accessed October 15, 2025, https://www.clemson.edu/finops/oes/occsafetyhealth/industhygiene/programs/threedprintsafety.html
3D Printer Safety - Environmental Health & Safety - University of Tennessee, Knoxville, accessed October 15, 2025, https://ehs.utk.edu/index.php/table-of-policies-plans-procedures-guides/3d-printer-safety/
3D Printer - Pitt Safety, accessed October 15, 2025, https://www.safety.pitt.edu/sites/default/files/docs/03-0253DPrinters.pdf
3d-printers-focus-sheet.pdf - UW Environmental Health & Safety, accessed October 15, 2025, https://www.ehs.washington.edu/system/files/resources/3d-printers-focus-sheet.pdf
3D printer safety rules: SLS setup & training tips - Sinterit, accessed October 15, 2025, https://sinterit.com/blog/sls-technology/before-you-start-printing-with-a-sls-3d-printer-3d-printer-health-and-safety-3d-software/
Sinterit Lisa - the most compact SLS 3D printer | Sinterit.com, accessed October 15, 2025, https://sinterit.com/3dprinters/lisa/
World's Most Affordable SLS 3D Printer - SLS4All.com, accessed October 15, 2025, https://sls4all.com/